
 Canada

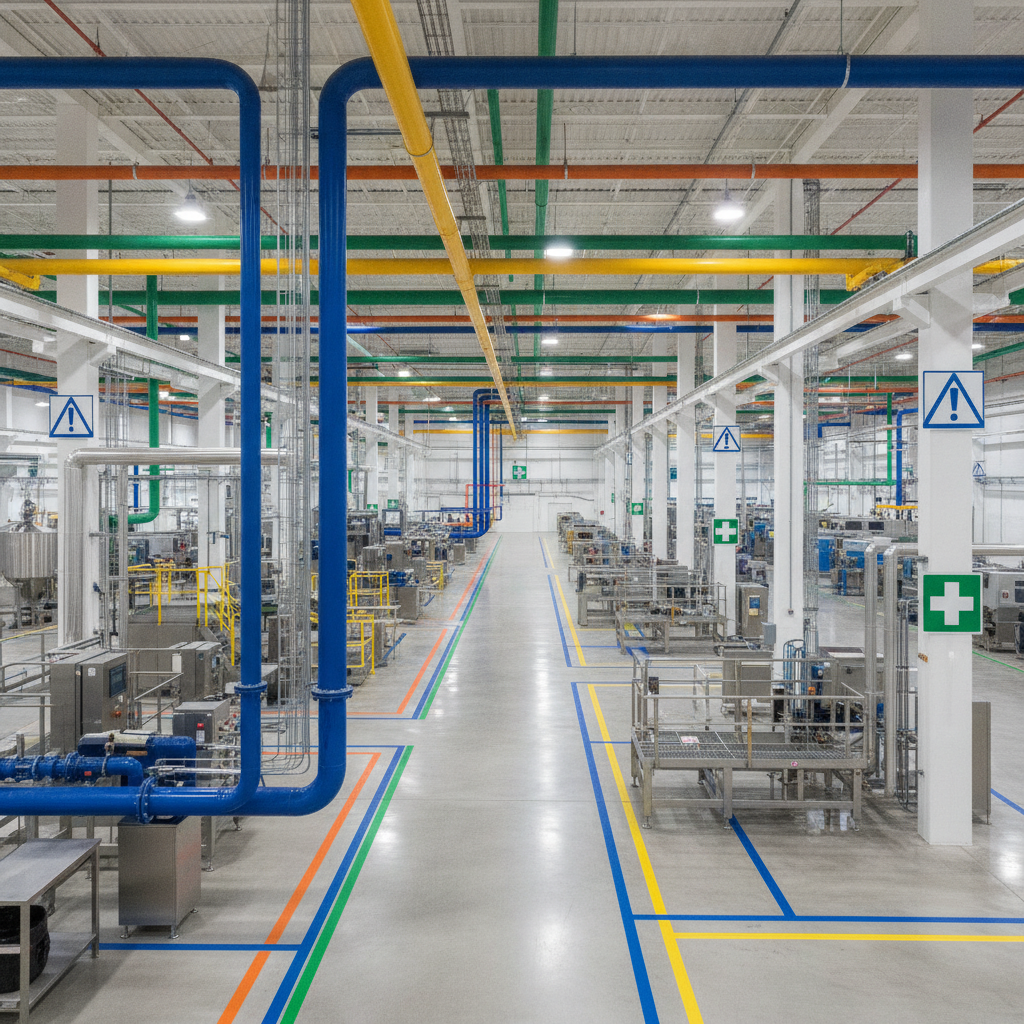
Marking systems are the standardized methods and materials used to identify pipes, equipment, hazards, and safe pathways across industrial and commercial facilities. In the USA, consistent markings reduce human error, streamline maintenance, and support regulatory compliance. VisionMarker provides ANSI‑certified, durable solutions that help you deploy a cohesive system across plants, warehouses, and utilities.
By Dante de Felice • Last updated: June 17, 2026
Quick Summary & Table of Contents
A complete marking system combines pipe markers, safety signs, labels, fire protection identifiers, and floor lines into one consistent language. Use clear color coding, legible text, and durable materials. This guide explains what marking systems are, why they matter, how to implement them, and how VisionMarker supports every step.
Use this overview to jump to the answers you need and implement proven practices fast across the local area and nationwide.
- What are marking systems?
- Why they matter for safety and compliance
- How marking systems work on the floor
- Types of marking systems
- Standards and regulations you must know
- Best practices for design and placement
- Tools, materials, and resources
- Implementation plan: 7 steps
- Case studies & examples
- FAQ: Marking systems
- Key takeaways & next steps

What Are Marking Systems?
Marking systems are the coordinated set of visual identifiers—pipe markers, safety signs, labels, fire protection symbols, and floor lines—that communicate hazards and information. They create a shared language for teams and contractors, helping people act quickly, avoid mistakes, and maintain compliance in complex facilities.
At their core, marking systems make critical information visible at a glance. When done right, they preempt confusion, prevent process upsets, and reduce incident risk during routine and non-routine work.
VisionMarker focuses on four pillars that anchor any effective program: piping identification, safety signs and posters, labels and stickers, and fire protection signage. These pillars map to everyday needs in industrial plants, warehouses, utilities, and construction sites throughout the USA.
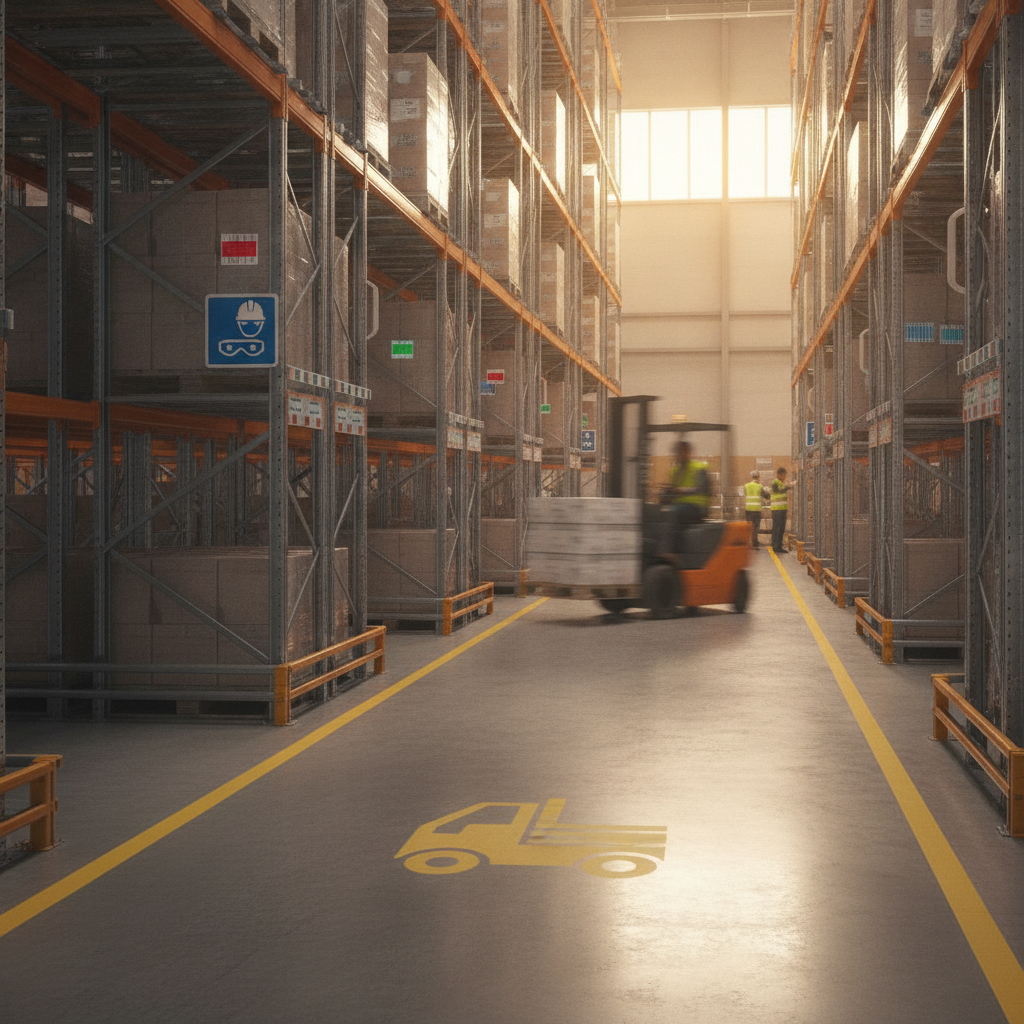
For example, standardized pipe markers speed up lockout-tagout preparation because technicians instantly understand medium and flow direction. Similarly, well-placed forklift traffic signs reduce near misses by clarifying right-of-way and pedestrian zones.
Why Marking Systems Matter for Safety and Compliance
Robust marking systems reduce human error, support OSHA/ANSI/NFPA alignment, and speed up maintenance. Clear visuals cut search time, prevent mix-ups, and help teams follow procedures under pressure—especially during shift changes, emergencies, or contractor mobilizations.
When safety information is hard to find, small mistakes snowball into incidents. Markings remove guesswork by encoding the right action in the right place. Consistent color, text size, arrows, and icons reduce misinterpretation and keep operations moving.
In our experience supporting national rollouts, facilities that standardize their visual language see faster onboarding of new workers and fewer work-order delays. Consistency across buildings and sites helps traveling technicians and contractors adapt quickly, which matters when deadlines are tight.
VisionMarker’s ANSI‑certified materials are engineered for UV, moisture, and chemical exposure, so information stays readable after cleaning cycles, outdoor weather, or washdown. Durable visuals are essential; faded or peeling signage undermines credibility and compliance.
How Marking Systems Work on the Floor
Effective systems layer information: critical hazards at eye level, directional detail on pipes, and workflow guidance on floors and doors. Each element reinforces the others, so the next right action is always visible from where work happens.
Here’s how the pieces align in practice across American facilities:
- Pipe markers identify contents and direction of flow so technicians isolate the correct lines fast.
- Safety signs deliver mandatory actions (PPE, lockout, restricted entry) and cautions at decision points.
- Labels & stickers carry equipment IDs, barcodes, and handling instructions that travel with assets.
- Fire protection signage points to extinguishers, hose valves, and alarm pulls so responders lose zero time.
- Floor and aisle markings route traffic, separate pedestrians, and highlight keep‑clear zones.
This layered approach reduces cognitive load. Instead of searching manuals, workers see what they need in the line of fire—on the pipe, the floor, or the door. The outcome is faster, safer decisions.
Types of Marking Systems (with Real-World Examples)
Most facilities combine five categories: pipe markers, safety signs, labels and stickers, fire protection identifiers, and floor/aisle markings. Selecting ANSI‑aligned designs and durable materials ensures everything reads clearly, survives harsh conditions, and integrates into one coherent system.
Pipe markers (ASME A13.1–aligned)
- Purpose: Identify contents and direction to speed isolation and reduce cross‑connection risk.
- Typical placement: Near valves, tees, and wall crossings; at regular intervals along long runs.
- VisionMarker example: Self‑adhesive markers for steam and process water help crews verify the right line before shutdown. See our Pipe ID guide and pipe marker catalog.
Safety signs (ANSI Z535 family)
- Purpose: Communicate hazards and actions (DANGER, WARNING, CAUTION) with consistent signal words and pictograms.
- Typical placement: Entrances, maintenance points, and areas with moving equipment or stored energy.
- VisionMarker example: “PPE Required,” “Keep Aisles Clear,” and “Lockout for Safety” signs placed at doorways and work cells.
Labels & stickers (equipment, racks, and containers)
- Purpose: Carry identifiers, barcodes, handling notes, or inspection status on assets and racking.
- Typical placement: On equipment nameplates, totes, and shelving beams where scanners can reach.
- VisionMarker example: Chemical‑resistant labels for washdown areas so data remains scannable after cleaning.
Fire protection signage (NFPA‑aligned)
- Purpose: Make extinguishers, sprinklers, hose stations, and alarm pulls unmistakable.
- Typical placement: Above or adjacent to devices; on doors to fire pump rooms and risers.
- VisionMarker example: NFPA‑style symbols and wayfinding to speed response. Explore our fire signage guide and fire safety products.
Floor and aisle markings
- Purpose: Define forklift lanes, pedestrian walkways, and keep‑clear zones around panels and eyewash stations.
- Typical placement: Main aisles, cross‑walks, and around equipment requiring service access.
- VisionMarker example: Durable caution stripes and symbols to reduce near misses in high‑traffic aisles.
When these elements follow one visual standard, you get fewer exceptions and faster task execution. Consistency is the quiet multiplier of safety performance.
Standards and Regulations You Must Know
Use recognized standards to lock in clarity: ASME A13.1 for pipe ID, ANSI Z535 for safety signs, and NFPA 170 for fire safety symbols. Standards align color, signal words, and symbols so anyone on site can interpret markings the same way—day one.
Standards create a baseline that travels with your people. Whether contractors arrive from across town or across the country, the same signal words, colors, and symbols should guide decisions without a learning curve.
- ASME A13.1 (pipe identification): Establishes color fields, flow arrows, and legibility guidance tied to pipe size and viewing distance.
- ANSI Z535 series (safety signs): Defines signal words (DANGER/ WARNING/ CAUTION), color coding, and layout conventions to prevent ambiguity.
- NFPA 170 (fire safety symbols): Aligns pictograms so critical devices are recognized instantly under stress.
- Sector‑specific considerations: Healthcare, labs, and gas systems often reference additional documents like NFPA‑99C or CGA guides for specialty gases.
For electrical safety culture, insights that echo visual‑clarity principles appear in industry commentary on NFPA 70E programs. For example, this discussion of NFPA 70E alignment emphasizes consistent labeling and periodic verification—practices that translate well to broader marking programs.
Best Practices for Designing and Placing Markings
Design for the user’s line of sight, not just the wall. Prioritize contrast, letter height, and pictograms. Place markings at decision points and repeat them along paths and runs. Favor durable materials that survive UV, moisture, and cleaning—so messages stay readable when conditions aren’t.
Design guidelines that reduce errors
- Make it glanceable: Use bold contrast and simple language. Pictograms speed recognition when noise or PPE reduce audibility.
- Size for distance: Increase letter height for longer aisles and elevated equipment platforms.
- Color with intent: Reserve red for immediate hazards and fire devices; keep color meanings consistent site‑wide.
- Directional clarity: Arrows on pipe markers matter; mis‑isolations are expensive and risky.
Placement habits that pay off
- Mark at decision points: Doors, starts of aisles, and before intersections.
- Repeat on long runs: Add markers at regular intervals, especially where line‑of‑sight is blocked.
- Keep clear zones visible: Floor boxes around panels and emergency showers must be unmistakable.
- Audit quarterly: Plan walkdowns to replace faded or damaged items before they fail in the field.
VisionMarker materials are engineered for UV, moisture, and chemicals, so you replace fewer items and retain legibility after washdown. That durability underwrites compliance year‑round.
Tools, Materials, and Resources
Select materials based on exposure: sunlight, cleaning, and temperature. Combine adhesive pipe markers, rigid aluminum signs, and high‑bond floor tapes. Keep applicators, cleaning wipes, and surface primers in a dedicated kit so installations are quick and consistent.
Material comparison (choose the right substrate)
| Material | Best For | Strengths | Considerations |
|---|---|---|---|
| Self‑adhesive vinyl | General pipe markers | Flexible, fast to install | Surface prep critical |
| Polyester/laminated label | Equipment IDs, barcodes | Chemical & abrasion resistant | Rigid; avoid tight bends |
| Rigid aluminum sign | Outdoor safety and fire | UV stable, high visibility | Needs mechanical mount |
| High‑bond floor tape | Aisles & keep‑clear zones | Fast, clean installs | Monitor for wear on turns |
Build a deployment kit: degreasing wipes, surface primers, squeegees, spare markers, and standardized templates. This small step shortens downtime and improves consistency.
For a broader picture of industrial coordination and layout planning, see this industrial systems overview, which mirrors how visual standards support safe, reliable work environments.
Implementation Plan: 7 Steps to Roll Out a Facility‑Wide System
Treat marking systems like any reliability upgrade: map the process, standardize the visuals, pilot a zone, and scale. Use a cross‑functional team, document placements, and schedule audits. The result is a maintainable system that reduces confusion and keeps work moving.
- Assess current state: Walk the floor, catalog pipes, devices, and decision points. Photograph gaps and note faded items.
- Define your standard: Choose colors, pictograms, and letter heights. Document when to use each element.
- Select materials: Match substrates to exposure (UV, washdown, heat). Align with ANSI and ASME where applicable.
- Pilot in one area: Prove the template in a busy zone—forklift aisles or a utilities corridor—then refine.
- Roll out by zone: Sequence work to minimize downtime. Use a kit for consistent installs.
- Train and brief: Explain signal words, colors, and symbols. Share before/after photos.
- Audit and sustain: Schedule quarterly checks. Track replacements and near‑miss feedback.
Need a starting point? See our curated self‑adhesive pipe markers guide and process water marker example to visualize placements and intervals.
Case Studies & Examples from the Field
Real programs succeed when they standardize visuals, select durable materials, and stage work to reduce downtime. These mini case studies show how different sectors apply the same principles to achieve fewer errors and faster response times.
Utilities corridor—multi‑building campus
A maintenance team faced frequent delays finding the correct isolation valves across buildings. We standardized ASME‑style markers and repeated arrows near tees and valves. After rollout, isolations during planned work became faster and required fewer call‑backs from senior techs.
High‑traffic warehouse—forklift and pedestrian flow
The operations leader reported recurring near misses at an intersection of two busy aisles. We added high‑bond floor lines, forklift symbols, and “Keep Aisles Clear” signs at eye level. The near‑miss log trended down as drivers and walkers followed the visual lanes.
Process area—washdown and chemical exposure
Original labels failed after repeated sanitation cycles. We replaced them with laminated, chemical‑resistant labels and relocated some signs out of direct spray. Readability stayed high through weekly cleanings, and operators stopped raising work orders for reprints.
For broader context on how physical systems and labeling coordinate, this framing systems overview underscores the value of consistent visual conventions during construction and commissioning.
Frequently Asked Questions
These quick answers cover placement, durability, and program maintenance so you can get started fast. Each response is concise and action‑oriented for busy EHS and maintenance leaders rolling out site standards.
What should I mark first if I have limited time?
Start with high‑risk and high‑traffic areas: chemical lines and steam pipes, main forklift aisles, emergency equipment, and entry doors. Mark decision points first, then repeat markings along longer runs so crews never lose the thread during a task.
How often should I audit my markings?
Plan quarterly walkdowns and add spot checks after weather events, shutdowns, or layout changes. Replace faded or damaged items promptly. Short, frequent audits keep programs healthy and prevent small issues from becoming systemic gaps.
Which materials hold up to washdown and sunlight?
Use laminated polyester or aluminum signs where chemicals and UV are present. High‑bond floor tapes perform well indoors on clean, dry concrete. For tight bends or insulation, flexible self‑adhesive pipe markers install faster and maintain adhesion with proper prep.
How do I align multiple buildings to the same standard?
Create a brief site standard with examples for colors, signal words, and placements. Pilot in one area, then scale zone by zone. Share photos, provide a small install kit, and add the standard to onboarding so new staff learn the visual language on day one.
Key Takeaways & Next Steps
Build one visual language, select durable materials, and maintain it with short, regular audits. Start where the risk and traffic are highest, then scale. VisionMarker supplies ANSI‑certified pipe markers, safety signs, labels, and fire signage to anchor your standard nationwide.
- Unify the language: One standard across signs, labels, pipes, fire, and floors.
- Design for visibility: Contrast, size, and pictograms reduce errors under pressure.
- Choose durability: Materials must survive UV, moisture, and chemicals.
- Audit often: Short, scheduled walkdowns keep the system reliable.
Ready to move? Explore the pipe marker collection or review our fire protection guide to plan your next zone.
Local considerations for your area
- Account for seasonal temperature swings across the USA by choosing adhesives and substrates rated for both hot summers and cold winters during installs.
- Schedule outdoor audits after storms and freeze‑thaw cycles; UV and moisture accelerate wear on exterior signs and exposed pipe runs.
- In multi‑site operations, standardize color and icon libraries so traveling crews and contractors recognize markings instantly regardless of the local area.
For cross‑discipline context on site readiness, this construction site safety overview echoes the value of visible, standardized cues during active work.
