
 Canada

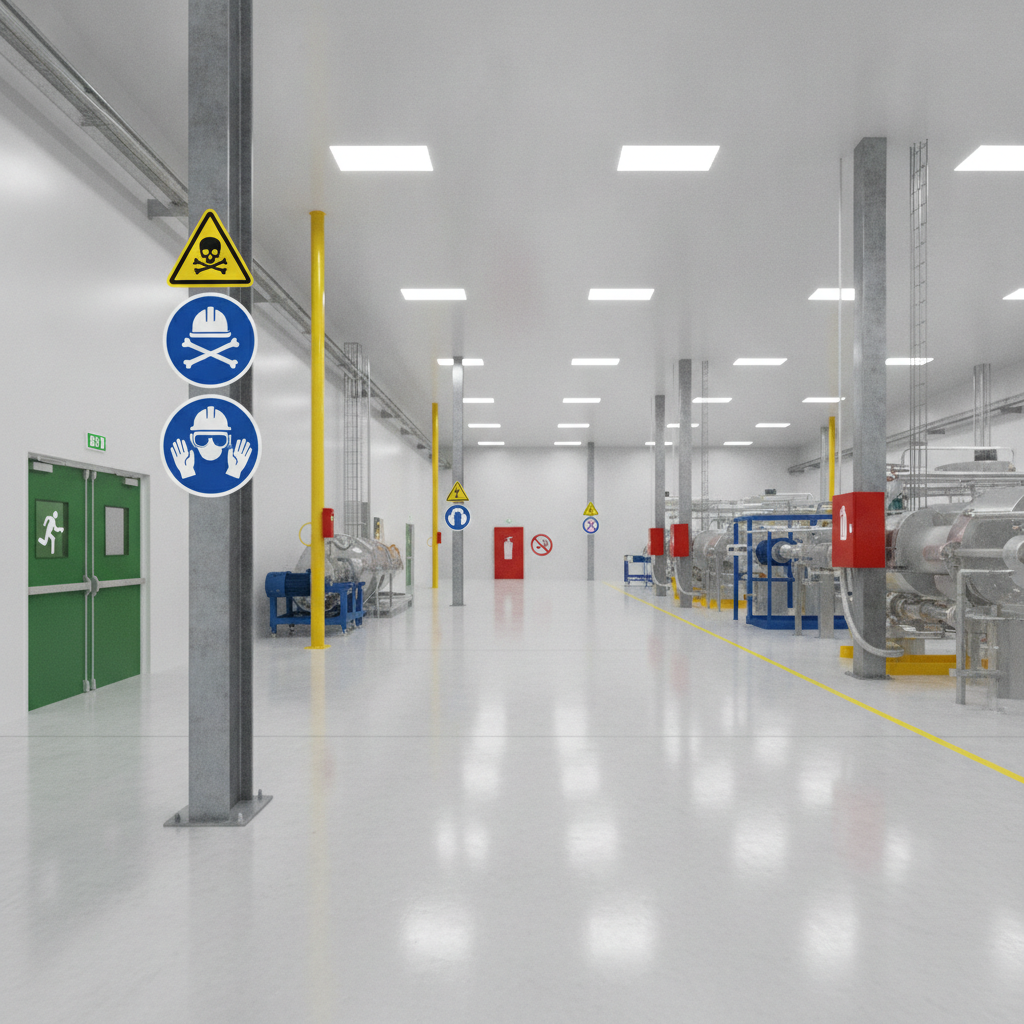
Safety symbols are standardized visual icons that communicate hazards, required actions, and emergency information without words. In the USA, they support OSHA alignment and ANSI/NFPA conventions so workers act fast and stay safe. VisionMarker designs durable, ANSI-certified signage and labels that keep these symbols clear and compliant in harsh industrial conditions.
By Dante de Felice · Last updated: 2026-07-01
Overview
This guide explains safety symbols used across U.S. workplaces, how they’re structured (color, shape, signal words), and where each applies. You’ll learn key standards (ANSI Z535, GHS/OSHA, NFPA 170, ASME A13.1), practical deployment tips, and tools to maintain compliance. We also map symbols to real industrial scenarios using VisionMarker solutions.
Use this quick overview to jump to what you need now and return later as your program matures. We’ve organized the content for scanning, fast decisions, and training support.
- Definition and purpose of safety symbols
- Why symbols reduce risk and support compliance
- How colors, shapes, and signal words work together
- Standards: ANSI Z535, GHS/OSHA, NFPA 170, ASME A13.1
- Common types and 12+ real-world examples
- Best practices, inspection cadence, and durability
- Tools, templates, and training resources
- Mini case studies from industrial environments
- What are safety symbols?
- Why safety symbols matter
- How safety symbols work
- Major standards and systems
- Types and examples
- Best practices
- Tools and resources
- Case studies and examples
- FAQ
- Related articles
- Conclusion
What Are Safety Symbols?
Safety symbols are standardized pictograms that convey hazards, mandatory actions, prohibitions, emergency routes, and equipment locations at a glance. They reduce language barriers, speed up decisions, and align with recognized U.S. standards so workers can respond correctly even under stress.
In our experience supporting industrial plants, utilities, warehouses, and construction sites, safety symbols translate complex rules into instant visual cues. VisionMarker’s portfolio—industrial signage, labels and stickers, pipe markers, and fire protection signage—ensures these cues remain visible and legible through UV, moisture, and chemical exposure.
- Core function: communicate risk and required behavior without words.
- Where used: doors, machinery, floor edges, pipe runs, chemical storage, and emergency routes.
- Why standardized: consistency reduces misinterpretation and training time.
- VisionMarker fit: ANSI-certified signs and engineered materials designed for harsh environments.
Put simply, safety symbols are the visual backbone of a modern safety program—fast to read, hard to misinterpret, and scalable across large facilities.
Why Safety Symbols Matter
Safety symbols cut response time, minimize errors, and support compliance. When hazards are marked clearly and consistently, teams recognize risk faster, choose correct PPE, and find emergency equipment quickly—especially valuable in high-noise or multilingual environments across the USA.
Here’s the thing: people under pressure don’t read paragraphs. They scan. Symbols use color, shape, and familiar iconography so decisions happen in seconds. That improves hazard awareness, shores up training gaps, and supports program audits.
- Faster recognition: consistent graphics beat ad hoc labels in urgent situations.
- Compliance support: symbols align with ANSI Z535, GHS/OSHA, NFPA 170, and fire-protection sign conventions.
- Training leverage: the same icons appear in orientations, SOPs, and on-the-job prompts.
- Human factors: color and shape coding reduces cognitive load and language barriers.
We’ve found that aligning field signage with the symbols used in digital training raises retention and audit readiness. Consistency is the multiplier.
How Safety Symbols Work (Color, Shape, Signal Words)
Effective symbols blend three elements: standardized colors, intuitive shapes, and clear signal words. Together they encode hazard severity and required behavior so any worker can decode the message instantly—whether the sign is read up close on a panel or glimpsed across a busy aisle.
Most U.S. facilities implement a layered design language: colors signal severity or category, shapes cue the action type, and signal words set urgency. Symbols then anchor training and SOPs.
Signal words and color intent
| Category | Typical Color | Signal Word | Meaning / Use |
|---|---|---|---|
| Danger | Red/Black/White | DANGER | Immediate hazard; will result in serious injury or death if not avoided. |
| Warning | Orange/Black/White | WARNING | Potentially hazardous; could result in serious injury or death. |
| Caution | Yellow/Black | CAUTION | Minor to moderate injury risk or unsafe practices. |
| Notice | Blue/White | NOTICE | Non-hazard safety or property information. |
| Safety | Green/White | SAFETY INSTRUCTIONS | First aid, exits, eyewash, or safe condition guidance. |
- Shapes: triangles often flag hazards; circles/roundels show mandatory actions; red slashed circles indicate prohibitions; squares/rectangles carry general and emergency information.
- Layout: many ANSI Z535-style signs include a signal panel, a symbol panel, and concise text for context.
- Legibility: match letter height and icon size to viewing distance and mounting height.
For deeper design tips and layouts, see our ANSI Z535 quick guide, which covers panel structure, color bands, and examples of good symbol-text pairing.
Major Standards and Systems You’ll Use
Most U.S. programs rely on ANSI Z535 for sign design, GHS/OSHA for chemical pictograms, NFPA 170 for fire safety symbols, and ASME A13.1 for pipe markers. Aligning these systems creates a consistent visual language from the production floor to mechanical rooms.
ANSI Z535 (Sign design system)
ANSI Z535 standardizes the components of hazard signs: signal words, colors, layouts, and the safety alert symbol where applicable. It’s the backbone for clear, consistent warning sign communication across equipment, aisles, and doors.
GHS/OSHA Hazard Communication pictograms
- There are nine GHS pictograms overall; OSHA enforces eight on chemical labels in the USA.
- Common icons: flame, gas cylinder, corrosion, skull and crossbones, health hazard (silhouette), flame over circle (oxidizers), exclamation mark, exploding bomb, and environment (non-mandatory under OSHA).
- Use them on primary containers and secondary labels; mirror them in training.
NFPA 170 (Fire safety and emergency symbols)
NFPA 170 provides standardized fire protection, firefighting, and emergency symbols—from extinguishers and hose reels to fire alarm pull stations and exits. Pair NFPA 170 icons with high-visibility placement and photoluminescent options where required. Explore our fire safety products for compliant symbolization.
ASME A13.1 (Pipe markers)
ASME A13.1 establishes a uniform system for identifying fluid contents and flow direction on piping. Clear, durable pipe markers help operators trace energy isolation points and reduce maintenance errors. VisionMarker supplies pipe markers engineered for UV, moisture, and chemical resistance.
For complementary electrical safety context on energized equipment and arc flash practices, see these perspectives on NFPA 70E and switchgear testing and a brief electrical safety guide.
Types of Safety Symbols and 12+ Practical Examples
You’ll encounter hazard, mandatory action (PPE), prohibition, emergency equipment, fire protection, safe condition, pipe identification, and floor/area marking symbols. The examples below show where each type belongs so you can deploy a consistent, high-coverage visual language across your facility.
Hazard symbols
- Electrical hazard: triangle symbol near open panels or test bays; pair with arc-flash labels where applicable.
- Crush/pinch point: on presses, conveyors, and automated cells with nip hazards.
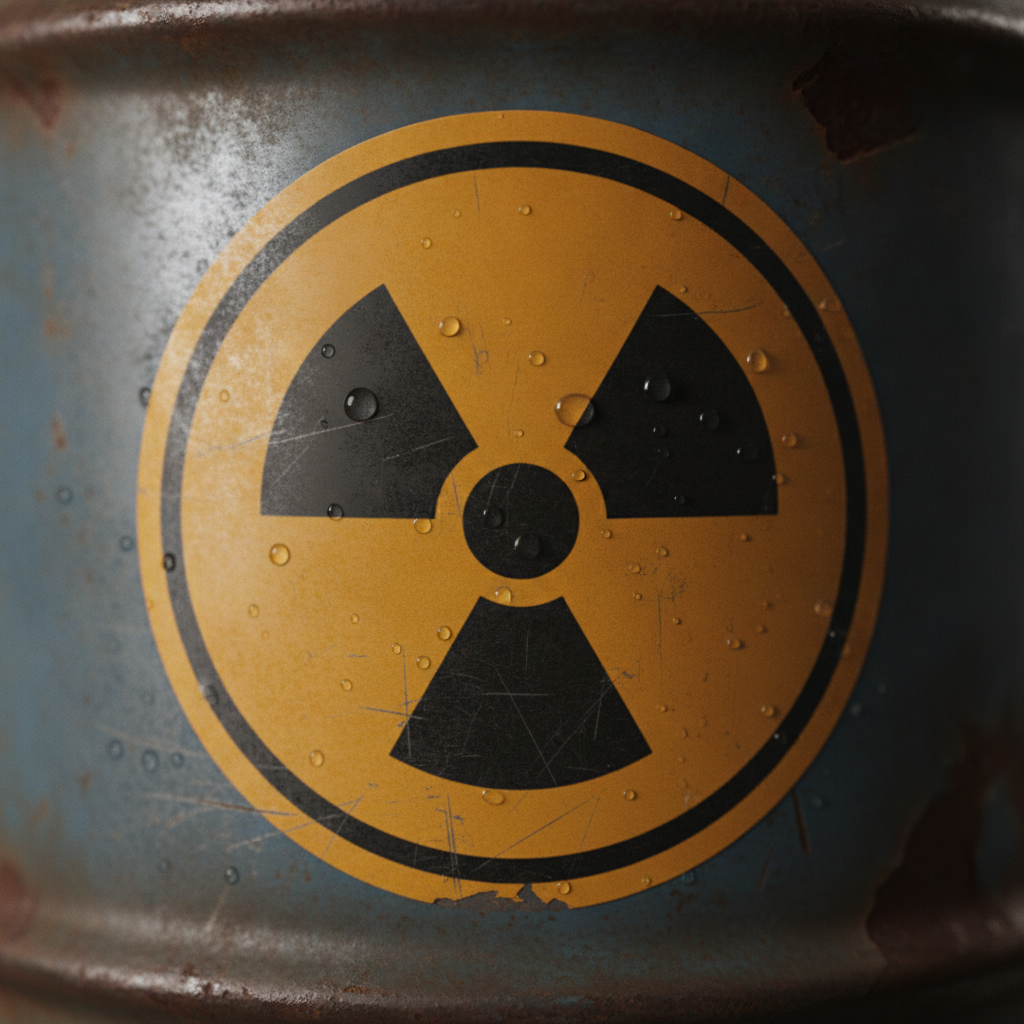
- Radiation: controlled areas around radiography, X-ray rooms, or isotope storage; see our radiation sign guide.
Mandatory action (PPE) symbols
- Eye protection required: entrances to grinding, cutting, or chemical splash areas.
- Safety goggles mandatory: lab benches and tank farm sampling ports.
- Hand protection required: caustic handling, hot work staging, or deburring stations.
- Face mask required: particulate control zones and dusty material transfer points.
Prohibition symbols
- No entry / Entry prohibited: interlocked machine cells during operation.
- No open flames: flammable liquid storage and refueling pads.
- No forklifts: pedestrian-only corridors or mezzanines.
Emergency and safe-condition symbols
- Emergency exit and directional egress: along primary and secondary routes.
- Eyewash and Safety shower: within required travel distances; see a typical safety shower sign.
- First aid: central cabinets and mobile kits; green/white for quick recognition.
Fire protection symbols
- Fire extinguisher: column posts and cabinets with clear alcove markings.
- Fire hose reel / standpipe: risers in stairwells and plant corridors.
- Fire alarm and manual pull station: lobbies, landings, and high-occupancy areas.
Pipe identification symbols (ASME A13.1 context)
- Flow arrows paired with content name help with lockout sequencing.
- Service category colors and contrast improve remote reading across mezzanines.
- Repeating intervals at changes of direction and near valves maintain visibility.
Floor and area markings
- Caution stripes: transitions, step-down edges, and trip hazards; see our hazard markings guide.
- Forklift traffic icons: intersections, one-way aisles, and pedestrian crossings.
- Keep aisles clear: posted at choke points and staging areas.
As you expand coverage, weave these symbols into SOPs, maintenance routes, and new employee checklists. Repetition builds muscle memory.
Best Practices for Deploying Safety Symbols
Build your symbol system on standards, then tune for the realities of your site. Prioritize legibility, placement, durability, and ongoing inspection. Use consistent iconography in training and field signage so workers don’t have to relearn visuals from one area to another.
- Map risks first: complete a hazard inventory before buying signs.
- Match the medium: rigid signs for posts/doors; decals for equipment; pipe markers for lines; floor tape/paint for edges and traffic.
- Size for distance: ensure letter height and icon size match viewing distances.
- Use contrast: high-contrast fields keep symbols legible under dust and glare.
- Durability matters: VisionMarker materials resist UV, moisture, and chemicals, keeping symbols readable through seasons.
- Standardize language: stick with ANSI Z535 layouts and GHS pictograms for consistency.
- Place at decision points: mount where choices are made (before the hazard or intersection), not after.
- Reinforce routes: repeat egress and equipment symbols at intervals and line-of-sight breaks.
- Document and audit: keep a sign register with locations, photos, and inspection dates.
- Train with the same icons: mirror field symbols in LMS modules, toolbox talks, and SOP graphics.
For a concise field reference to panel structure and legibility, bookmark our ANSI Z535 guide and this practical walkthrough of marking systems that reduce mistakes.
Tools and Resources for EHS Teams
Speed up implementation with a symbol inventory template, a site walk checklist, and durable media suited to your environment. Pair that with refresher training and an annual audit, and your visual safety system will stay effective year-round.
- Symbol inventory template: catalog current signs, their conditions, and gaps.
- Walkthrough checklist: verify mounting height, viewing distance, lighting, and obstructions.
- Media selection guide: match substrates and adhesives to heat, chemicals, or outdoor exposure.
- Pipe marker plan: identify services, flow direction, and repetition intervals per ASME A13.1 conventions.
- Training deck: 20–30 slides using your actual site symbols for quick refreshers.
- Annual audit cadence: schedule ahead of peak maintenance outages.
- Replacement buffer: keep 5–10% spares of critical symbols and tape colors.
Explore our fire protection equipment guide and fire safety products for standardized NFPA 170 iconography and deployment tips.

Case Studies and Real-World Scenarios
These brief scenarios show how standardized symbols close safety gaps. Each example mirrors real constraints—noise, mixed languages, harsh conditions—and highlights how a consistent visual system improves response time and audit readiness.
1) Pipe room confusion → clear ASME-aligned identification
A maintenance team struggled to isolate the right condensate line during a rush shutdown. We deployed high-contrast pipe markers with flow arrows at each change in direction and near valves. After alignment, crews traced lines quicker and restored service more confidently.
2) Forklift near-miss cluster → traffic symbolization and floor markings
Multiple near-misses at a blind intersection flagged a visibility problem. We added forklift and pedestrian icons at approach zones, high-contrast caution stripes, and one-way arrows. Drivers reported better line-of-sight guidance, and supervisors noted fewer stop-and-wait standstills.
3) Lab splash incident → PPE and emergency equipment symbol refresh
Following a minor splash event, a site refreshed goggle and glove symbols at each lab entry and added photoluminescent eyewash/shower icons along egress routes. Toolbox talks reused the same symbols. New hires found emergency points faster during drills.
Consistency across training and field icons is what makes these changes stick. The same visuals appear on doors, decals, and SOPs—no guesswork in the moment.
Frequently Asked Questions
Common questions focus on which symbols are mandatory, how often to inspect them, and how to standardize across large sites. These brief answers address the basics so you can move quickly from planning to implementation.
What are the main categories of safety symbols?
Most programs use hazard symbols, mandatory action (PPE) symbols, prohibition symbols, emergency and safe-condition symbols, fire protection symbols, pipe identification markers, and area/floor markings. Using these together creates a complete visual language across equipment, aisles, and exits.
How often should we inspect safety symbols?
Perform a formal inspection at least annually and after major maintenance outages. In harsh areas, add quarterly checks. Replace anything faded, obstructed, damaged, or relocated. Keep a sign register with photos, dates, and responsible owners to simplify audits.
Do GHS pictograms apply to every chemical container?
Primary workplace containers must carry the appropriate GHS pictograms, along with other label elements. For secondary containers and small vessels, follow your written hazard communication program and ensure workers can identify hazards at a glance during use.
Where should emergency and fire symbols be placed?
Place them along egress routes, at line-of-sight breaks, and directly at equipment such as extinguishers, pull stations, eyewash, and showers. Use photoluminescent or high-contrast materials where lighting may be poor or smoke could reduce visibility.
How do safety symbols relate to training?
Use the exact same icons in orientations, SOPs, and toolbox talks that appear on doors and equipment. Familiarity reduces reaction time and errors. Keep a short slide deck that matches field symbols so refresher sessions reinforce what workers see daily.
Related Articles
Deepen your program with targeted, standards-driven topics. The articles below expand on symbol design, hazard marking strategy, and fire protection iconography so you can address specific use cases across your site.
Start with our practical ANSI Z535 quick guide to confirm panel structure and layouts. Then review marking systems that cut mistakes and an overview of fire safety products using NFPA 170 symbols. If you’re standardizing hazard visuals, our hazard markings guide pairs well with this article.
Conclusion
Safety symbols let every worker spot hazards, understand required actions, and find emergency equipment—fast. Build your system on standards, deploy for legibility and durability, and keep an audit-ready register. Consistency across training and field signage turns symbols into everyday safety behavior.
- Key takeaways:
- Anchor your program in ANSI Z535, GHS/OSHA, NFPA 170, and ASME A13.1.
- Place symbols at decision points and size them for real viewing distances.
- Choose durable media that survive UV, moisture, and chemicals.
- Mirror field icons in training to speed recognition.
- Audit yearly and after major maintenance to keep coverage tight.
Need help standardizing symbols across multiple facilities? VisionMarker supplies ANSI-certified signs, ASME A13.1 pipe markers, durable labels & stickers, and NFPA 170 fire protection signage with quick turnaround. Let’s align your visuals and training so safety sticks.
Explore solutions on our website or reach out to our team for guidance.
