
 Canada


Pipe markers on a roll are continuous, self-adhesive bands used to identify pipe contents and flow direction across long runs. In the USA, facilities use roll-form markers to meet ASME/ANSI labeling rules, speed installation, and standardize colors. They’re ideal for long routes, frequent changes, and fast, consistent pipe identification at scale.
By VisionMarker · Last updated: 2026-06-25
Start here: hook and table of contents
Use pipe markers on a roll when you need fast, uniform identification across many pipes. This guide shows how to meet ASME A13.1 and ANSI Z535 basics, size markers by diameter, place them where people look, and choose materials that survive heat, UV, moisture, and chemicals.
- What is a roll-form pipe marker?
- Why these markers matter
- How roll markers work
- Types and when to use each
- Key standards and compliance
- Sizing and placement rules
- Materials and durability
- Installation steps
- Best practices
- Tools and resources
- Comparison table
- Case studies and examples
- Pricing factors (no numbers)
- Maintenance and auditing
- Related guides and standards
- FAQ
- Conclusion
Summary
Choose roll-form pipe markers when you need fast, consistent labeling across long pipe runs. Match ASME A13.1 colors, confirm letter height by pipe diameter, and place identifiers at entry/exit points, valves, and every 25–50 feet. Use durable, UV- and chemical-resistant vinyl for indoor/outdoor reliability and document everything in your labeling matrix.
- What you’ll learn: definitions, standards, sizing, materials, and installation steps for roll-form markers.
- Who it’s for: facility managers, EHS pros, maintenance teams, and operations leaders.
- Why it matters: clear, compliant labels cut response time and improve safety across the floor.
- What you’ll get: checklists, a comparison table, field-proven workflows, and auditing tips.
What are pipe markers on a roll?
Roll-form pipe markers are continuous, self-adhesive bands dispensed from a roll and cut to length. They wrap around pipe exteriors to show contents, direction, and safety color per standards. Crews prefer rolls for long routes, inventory simplicity, and speed when labeling many pipes at once.
Roll markers combine a durable base film, pressure-sensitive adhesive, and protective laminate. Teams cut lengths on the fly, then wrap and overlap to form a 360-degree identifier. This format keeps labeling uniform over dozens or hundreds of feet and minimizes SKU complexity compared with many pre-cut sizes.
- Core purpose: communicate contents and hazards to anyone on the floor—at a glance.
- 360° visibility: overlapping wraps provide viewability from multiple approach angles.
- Scalable: one roll can label many locations without managing a bin full of sizes.
- Standards-aligned: format supports ASME A13.1 identification and ANSI Z535 color/contrast conventions.
For buyers building or refreshing a plant-wide program in the USA, VisionMarker’s focus on ANSI-certified materials and multi-standard alignment helps ensure your markings remain legible under UV, moisture, and common cleaning chemicals.
Why roll-form pipe markers matter
Clear pipe identification reduces errors, speeds maintenance, and supports emergency response. When color, text size, and arrow direction are consistent, technicians locate isolation points faster and responders avoid cross-connection mistakes. Standardized markers also streamline audits, training, and contractor onboarding.
Mislabeling can delay lockout, extend shutdown time, and increase risk. Consistent, legible identifiers shorten wayfinding and reduce learning curves for new hires. In our experience supporting EHS teams across the USA, a documented legend and visible arrows improve verification speed—especially at valves and transfer stations.
- Safety signal strength: high-contrast color bands and arrows guide decisions under stress.
- Operational speed: consistent placement trims search time for valves, drains, and isolation points.
- Audit-ready: uniform labeling aligns with written procedures and P&IDs for easier field checks.
- Training impact: newcomers recognize categories quickly when colors and letter heights stay consistent.
VisionMarker’s catalog spans pipe identification, safety signs, labels and stickers, and fire protection signage, so your pipe markers on a roll can match adjacent safety communications for a cohesive visual system.
How roll-form pipe markers work
Roll markers use durable films with pressure-sensitive adhesive. Crews measure the pipe circumference, cut a length with 10–20% overlap, align flow arrows, and squeegee for full contact. The result is a tight, 360-degree band that resists peeling under heat, moisture, and cleaning when matched to the environment.
Most rolls arrive in safety color families. Teams add arrow bands and text using companion overlays or pre-printed segments. On accessible runs, an experienced two-person crew can complete large sections efficiently when surfaces are prepped and tools are kitted.
- Prepare surface: clean/degrease; wipe dry (no condensation).
- Measure/cut: circumference plus 10–20% overlap (larger pipes favor 20%).
- Align arrows: point in the normal flow direction; use double-headed where bidirectional.
- Wrap and squeegee: tension the film; eliminate bubbles; seal the seam.
- Verify placement: near valves, junctions, and every 25–50 feet on straight runs.
For self-adhesive programs, see our step-by-step framework in the self-adhesive pipe markers guide and cross-check color decisions with our ANSI Z535 quick guide.
Types, formats, and when to use each
Select roll markers by material, adhesion, and environment. Vinyl with acrylic adhesive covers most indoor uses; laminated or polyester films boost chemical and UV resistance outdoors. For insulated or rough pipes, choose high-tack adhesives; for hot lines, use higher temperature ratings and compatible films.
Common roll materials
- Vinyl (PVC): flexible, conformable, good print hold; typical service windows around -40°F to 176°F.
- Polyester (PET): higher tensile strength; better chemical and UV resistance for outdoor racks.
- Laminated constructions: added abrasion resistance for washdown and high-traffic areas.
Adhesive options
- General-purpose acrylic: broad surface compatibility and reliable aging.
- High-tack acrylic: textured insulation, painted, or powder-coated pipes.
- Temperature-rated adhesives: elevated surface temps or intermittent heat cycles.
Applications by environment
- Indoor plant floors: standard vinyl rolls with companion arrows.
- Outdoor racks: UV-stable PET or laminated vinyl to resist fading.
- Washdown zones: laminated surfaces and sealed edges to block moisture.
- Chemical areas: polyester with solvent-resistant inks and aggressive adhesive.
For a deeper program view, our piping identification guide walks through system mapping, legends, and integration with broader industrial signage.
Standards that govern color, text, and placement
ASME A13.1 defines pipe identification colors and letter height by pipe diameter, while ANSI Z535 informs safety color and contrast principles. Use arrows for flow direction and place markers at valves, points of entry/exit, and regular intervals along straight runs to maintain visibility.
Standards align teams on color categories (e.g., water, steam, air) and legibility. While roll markers are a format choice, the underlying rules apply to all identification methods. Harmonizing color, letter height, and spacing across the facility reduces confusion and speeds decisions during maintenance or emergencies.
To operationalize these requirements, start with our ANSI pipe labeling explainer for a plain-language overview, then reference our ANSI Z535 guide to tune color and contrast in adjacent safety signs so your facility reads as a single system.
For a general look at how standards shape industrial programs, see this overview of standards across manufacturing. While not specific to pipe ID, it illustrates how multiple bodies interact in real projects.
Sizing rules and placement that pass audits
Size text by outside diameter and keep contrast high. Typical letter heights range from 0.5 inches on small lines to 3.5 inches on large mains. Place identifiers at 25–50 foot intervals, within 3–5 feet of valves, and at walls, floors, and equipment interfaces to match common sightlines.
Letter height quick guide
- ≤0.75 in OD: 0.5 in letters
- 1–2 in OD: 0.75 in letters
- 2.5–6 in OD: 1.25 in letters
- 8–10 in OD: 2.5 in letters
- ≥12 in OD: 3.5 in letters
Placement checklist
- Near valves, flanges, and drains
- At walls, floors, and ceiling penetrations
- At equipment interfaces (pumps, heat exchangers)
- Every 25–50 ft on straight runs
- Both sides of bulkheads and fire walls
Remember to place arrows in the normal flow direction. If your process is routinely reversed, use double-headed arrows. For crowded racks, repeat identifiers so at least one is visible from common approach angles without stepping over guards.
Materials, durability, and environmental fit
Match film and adhesive to heat, UV, moisture, and chemical exposure. Laminated vinyl or polyester extends life in washdown and outdoor zones. High-tack adhesives grip insulation and textured coats; edge sealing prevents wicking where condensation forms or where frequent cleaning is expected.
- Heat: choose constructions that match steady-state and peak temperatures.
- UV: outdoor racks need UV-inhibited films and pigments to reduce fading.
- Moisture: laminated surfaces and sealed seams block ingress and delamination.
- Chemicals: PET and solvent-resistant inks hold up to cleaners and degreasers.
VisionMarker engineers materials to resist UV, moisture, and chemical exposure for long service life, aligning with our broader portfolio of ANSI-certified safety signs and labels that share similar durability profiles.
Step-by-step installation guide
Successful installs follow a clean, dry surface; correct cut length; arrow alignment; and firm pressure to wet out adhesive. Use a helper for large diameters. Document each run in your labeling matrix so future crews know what’s installed, where, and when to refresh.
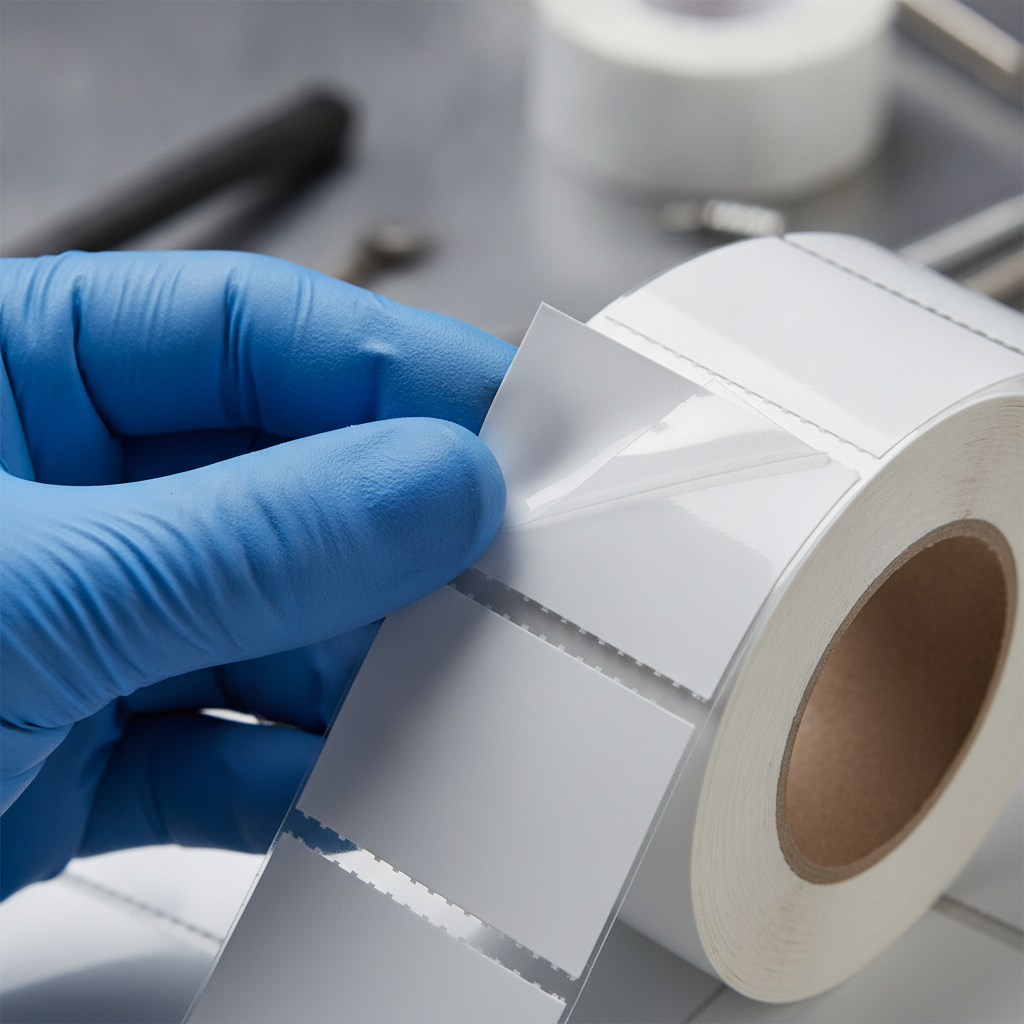
- Clean: degreaser, lint-free cloth; confirm dry.
- Measure: circumference + 10–20% overlap for a tight seam.
- Cut: square the ends for straight alignment.
- Align: use a reference line for arrows and text orientation.
- Apply: tack one edge, wrap under tension, squeegee bubbles.
- Seal: roll the seam; edge-seal in wet or washdown zones.
- Record: update your pipe labeling matrix and P&ID references.
Need a full plant roadmap? Start with our pipe ID guide and browse the pipe markers category when you’re ready to specify formats and colors.
Best practices from the field
Standardize a color legend, pre-plan routes, and kit rolls, arrows, and surface prep into mobile carts. Train crews on letter height, interval spacing, and arrow direction. Audit quarterly in critical areas and refresh any faded, peeled, or obstructed identifiers immediately.
- Pre-job survey: confirm media, flow, and isolation points.
- Kitting: rolls, arrows, cleaning supplies, flexible tape, squeegees.
- Training: a short toolbox talk on standards before work begins.
- Quality checks: spot-check letter height and placement every 10–15 installs.
- Documentation: as-built photo log with run IDs for future reference.
Our team supports standards mapping, material selection, and quick-turn production for USA facilities.
For adjacent hazard communication, our marking systems safety guide explains how floor, wall, and pipe IDs should complement each other visually.
Tools and resources you’ll actually use
Equip teams with cleaning agents, measuring tapes, cutters, squeegees, and edge sealers. Keep a printed color legend, letter-height chart, and a labeling matrix template on hand. A barcode or QR system connected to P&IDs speeds future maintenance and audits, especially after shutdown modifications.
- Field tools: degreaser, lint-free wipes, flexible tape, shears, squeegee/roller.
- Reference kit: color legend, letter-height quick guide, arrow policy.
- Digital assets: P&IDs, labeling matrix spreadsheet, photo log folder.
- Safety: gloves, eye protection, lockout/tagout coordination.
Even outside pipe ID, understanding basic piping topics helps teams communicate. This primer on choosing drain pipe size illustrates why diameter and distance influence visibility and flow decisions during field work.
Roll markers vs. other identification methods
Roll-form markers excel at speed and scalability. Snap-on sleeves suit hot, oily, or non-adhesive surfaces. Die-cut labels work for short runs and tight spaces. Painted stencils and rigid tags serve extreme heat or when mechanical attachment is required.
| Method | Strengths | Limitations | Best use |
|---|---|---|---|
| Roll-form adhesive | Fast, 360° wrap, scalable | Needs clean, dry surface | Long runs, standard temps |
| Snap-on sleeves | No adhesive; removable | Limited color/size range | Hot, oily, rough pipes |
| Die-cut labels | Precise sizes, easy | More SKUs to stock | Short runs, small pipes |
| Painted stencils | High-temp compatible | Prep time; overspray risk | Very hot or dirty zones |
| Rigid tags/plates | Mechanical fastening | Not 360° visible | Outdoor, extreme duty |
If you prefer pre-printed arrows with IDs, explore our pipe marker with arrow or browse the full pipe markers category for roll and non-roll formats.
Brief case examples
Across manufacturing and utilities, roll-form markers cut install time and standardize visibility. Teams report faster lockout confirmation and fewer tracing errors after adopting a color legend, letter-height rules, and interval placement checked during quarterly audits.
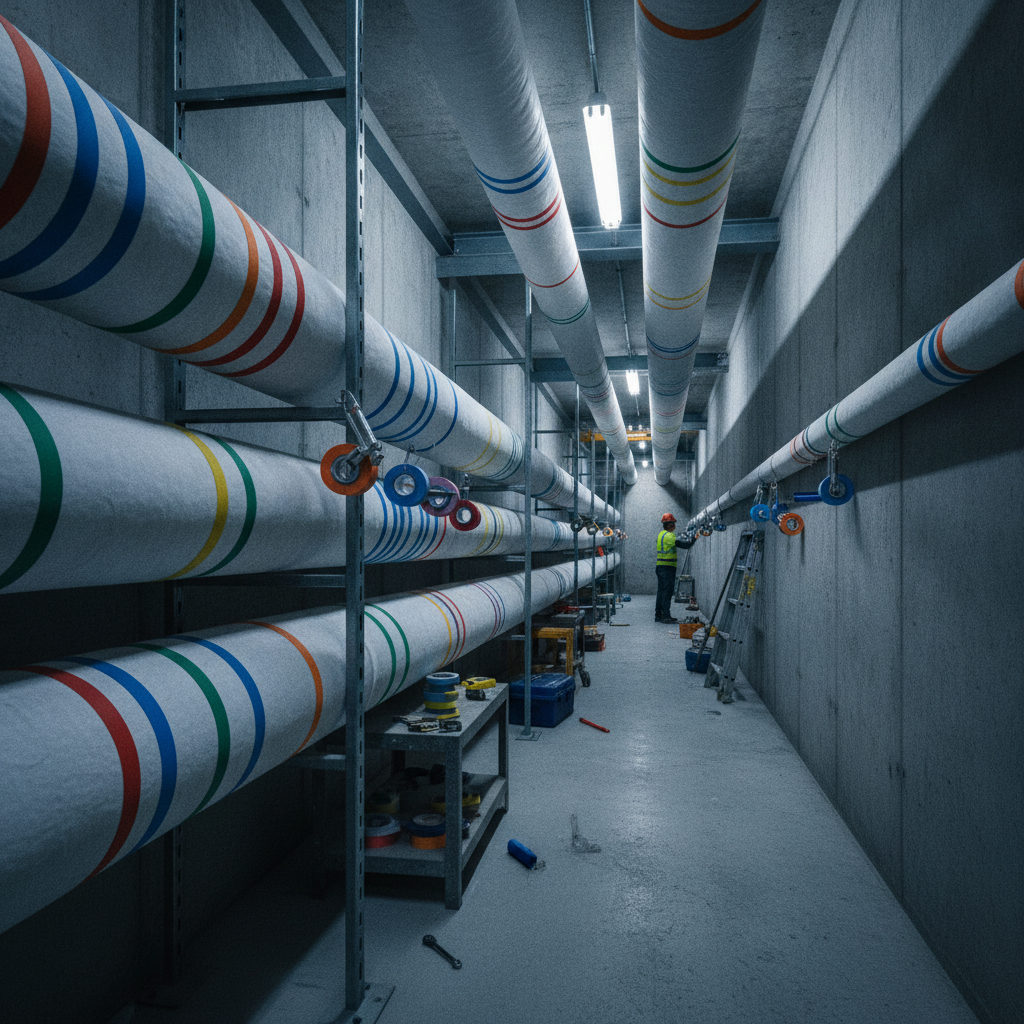
- Food processing: laminated vinyl rolls withstand daily washdown; quarterly checks maintain contrast and adhesion.
- Power generation: PET films resist UV on outdoor racks; arrows at each valve station speed verification.
- Distribution centers: standardized color bands reduce training time for maintenance and contractors.
For a broad refresher on utilities and fluids, even general plumbing explainers such as detecting leaks via water meters can help planners think about visibility and access during future audits.
Pricing factors (value without the numbers)
Total value depends on material construction, environment, pipe count, access, and documentation quality. Rolls reduce per-location time and inventory complexity, while higher-grade films extend service life. Plan around shutdown windows to minimize labor disruption and rework across critical lines.
- Material grade: vinyl vs. PET, with/without laminate and UV inhibitors.
- Exposure: heat, UV, moisture, and chemicals shape construction choices.
- Scope: number of lines, diameters, and access constraints guide rollout plans.
- Program quality: labeling matrix, audits, and spares on hand reduce downtime.
Maintenance and auditing cadence
Create a labeling matrix, assign owners, and set review intervals. Many plants inspect high-traffic areas quarterly and full routes annually. Replace any faded, peeled, or obstructed markers immediately and log the change against P&IDs and work orders for traceability.
- Quarterly: entrances, production lines, and washdowns.
- Semiannual: mezzanines, corridors, mechanical rooms.
- Annual: full facility sweep tied to shutdown or audit prep.
- Trigger-based: after modifications, repaints, or insulation work.
Related guides and standards
Strengthen your program by pairing roll-form markers with a clear legend, ANSI-aligned signage, and documented procedures. Use practical guides that translate standards into field steps, and verify color/contrast choices with real-world lighting and distance checks.
For standards-driven implementation, start with our ANSI pipe labeling guide and our ANSI Z535 quick guide. When you’re ready to select products, browse our pipe markers for roll and pre-printed options.
Frequently Asked Questions
Roll-form markers are ideal for long runs and standardized programs. Choose materials by environment, size text by pipe diameter, and place identifiers near valves and at set intervals. Keep a labeling matrix to maintain consistency and pass audits with confidence.
What is the main advantage of pipe markers on a roll?
Speed and scalability. With a continuous roll, you cut exactly what you need, wrap 360°, and keep colors consistent across many locations without managing dozens of pre-cut sizes.
Where should I place roll-form markers?
Place markers near valves and junctions, at walls and floors where pipes enter or exit an area, and at regular intervals—often every 25–50 feet—so identifiers are visible from common approach angles.
How do I choose the right material?
Match the film and adhesive to exposure: standard vinyl for indoor dry areas, laminated vinyl or polyester for washdowns and outdoors, and high-tack adhesives for insulation or textured coatings.
Do roll markers meet ASME/ANSI requirements?
Yes, when you apply the correct color family, letter height for the pipe diameter, and flow arrows, roll-form markers support ASME A13.1 identification principles and ANSI Z535 color/contrast guidance.
Conclusion and next steps
Roll-form pipe markers deliver speed, consistency, and standards alignment for USA facilities. Build a color legend, size text by pipe OD, and place identifiers near valves and at intervals. Choose materials for the environment and maintain a living labeling matrix to sustain performance over time.
- Key takeaways: rolls are fast, scalable, and audit-friendly; size and place for visibility.
- Action steps: confirm your legend, kit the right materials, schedule audits, and document installs.
- Support: partner with a provider that aligns to ASME A13.1 and ANSI Z535 across product lines.
Ready to standardize your program? VisionMarker supports standards mapping, material selection, and quick-turn production across the USA. Explore our guidance above or contact us to discuss your application.
