
 Canada

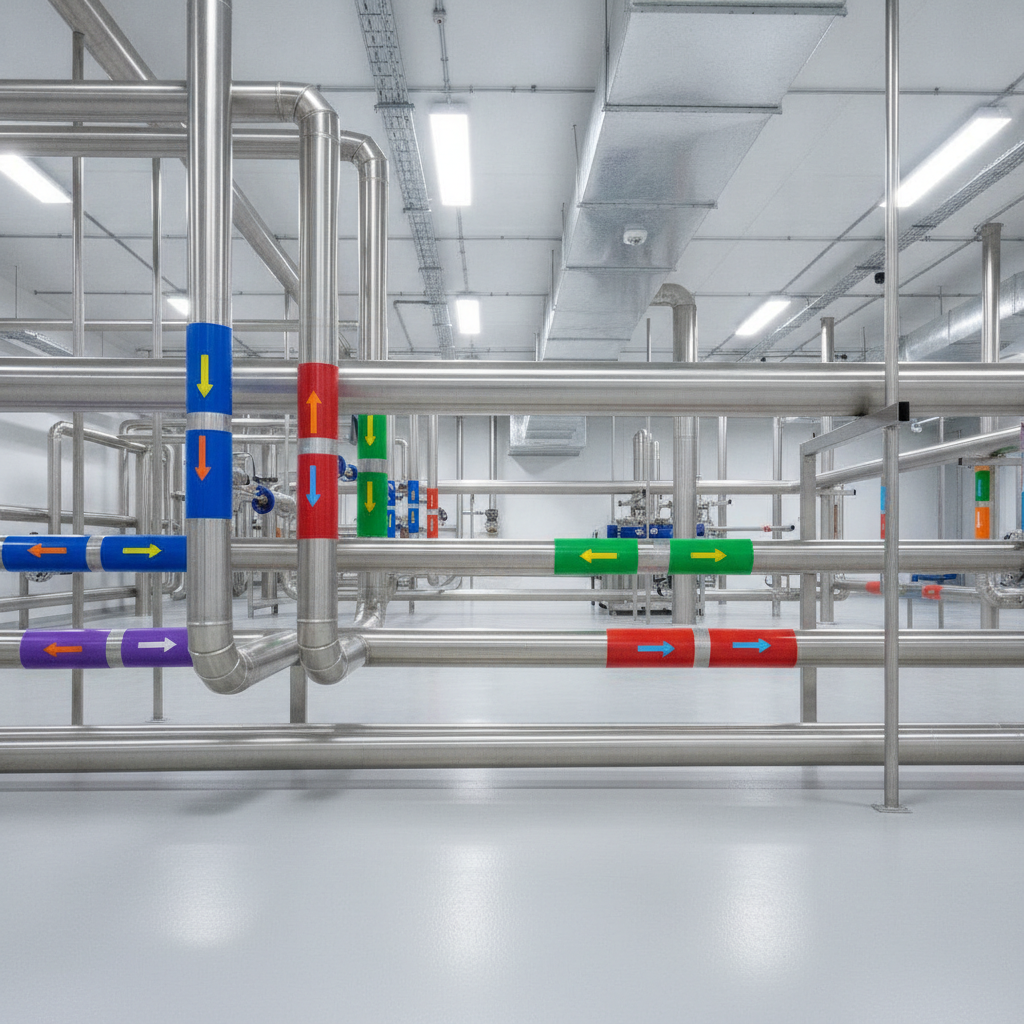
ANSI pipe labeling is the standardized practice of marking pipes with color fields, flow arrows, and clear legends so anyone can quickly identify contents and direction. In the USA, most facilities align with ASME A13.1 and ANSI Z535 principles to strengthen hazard communication and reduce errors during operations, maintenance, and emergency response.
By VisionMarker · Last updated: June 24, 2026
Above-Fold Overview & Table of Contents
Use ANSI pipe labeling to identify pipe contents, hazards, and flow direction at a glance. This guide shows what the standards require, how to survey your lines, which marker sizes and colors to use, and how to maintain labels so teams and first responders can act fast and stay safe.
Here’s how to use this complete guide from VisionMarker, a USA-wide provider of ANSI-certified signage and pipe markers:
- What ANSI/ASME labeling means and where it applies
- Why pipe markers reduce risk and response time
- How to execute a compliant labeling program step-by-step
- Marker types, materials, and selection criteria
- Best practices for visibility, durability, and audits
- Tools, templates, and maintenance routines
- Case examples and quick wins for your facility
- What Is ANSI Pipe Labeling?
- Why ANSI Pipe Labeling Matters
- How ANSI Pipe Labeling Works
- Types, Materials, and Approaches
- Best Practices and Placement Rules
- Tools and Resources
- Case Studies and Examples
- FAQ
- Conclusion
- Related Articles
Quick Summary
ANSI/ASME pipe markers use color fields, short legends, and arrows to communicate what’s in a pipe and which way it flows. Successful programs follow ASME A13.1 color categories, ANSI Z535 design clarity, and consistent placement at entry/exit points, valves, and regular intervals along long runs.
VisionMarker serves safety-led teams across the USA with ANSI-certified markers engineered for UV, moisture, and chemical resistance. We help facility managers and EHS leaders standardize labels across plants, utilities, warehouses, and construction environments, and we support fast turnarounds for time-critical rollouts.
What Is ANSI Pipe Labeling?
ANSI pipe labeling is the standardized identification of pipe contents and flow using color fields, concise text legends, and directional arrows. In the USA, most programs align with ASME A13.1 content categories and ANSI Z535 visual design principles so workers and responders can read markers quickly from safe distances.
In plain terms, you label each line so anyone can answer two questions fast: What’s in this pipe? Which way does it flow? Programs typically:
- Adopt ASME A13.1 content categories and common color fields for critical fluids.
- Follow ANSI Z535 for readable legends, contrast, and symbol clarity.
- Place flow arrows at each marker to prevent trace-back confusion.
- Use letter heights sized to pipe O.D. for legibility at a glance.
- Install markers at entry/exit points, valves, tees, and at intervals along long runs.
From our field experience, the fastest gains come from standardizing a short list of approved legends and colors, then applying them line-by-line during a structured survey. For fundamentals of pipe ID and terminology, see our pipe ID guide.
Why ANSI Pipe Labeling Matters
Clear pipe markers cut response times, reduce errors, and strengthen compliance. Labels let operators and first responders identify hazards in seconds, align isolation steps, and prevent mix-ups during maintenance, startups, and emergencies.
Here’s why teams across the USA invest in a standards-based program:
- Faster emergency response: Legends and arrows guide first responders to the right valves without guessing.
- Fewer maintenance errors: Crews verify contents before breaking into a line, reducing the chance of the wrong isolation.
- Compliance alignment: ASME A13.1 categories and ANSI Z535 design clarity support a recognizable visual language.
- Training efficiency: New hires learn color/legend patterns quickly and apply them consistently.
- Audit readiness: Documented placement and materials simplify EHS audits and management of change.
Multiple safety disciplines reinforce this. For example, electrical programs emphasize rapid hazard recognition and standardized visuals; industry electrical guides similarly promote consistent, readable identification so teams act decisively under pressure.
For a quick primer on broader safety language, review our ANSI Z535 quick guide; it shows how pipe markers and facility signage use the same human-factors logic.
How ANSI Pipe Labeling Works
Build your program around a survey, a standard legend list, and durable markers sized to pipe O.D. Use ASME A13.1 color categories, ANSI Z535 readability, and place markers at entries, valves, changes in direction, and fixed intervals along long straight runs.
Successful rollouts follow a simple but disciplined process:
- Define your standard: Approve color categories, legends, and minimum letter sizes.
- Survey lines: Walk each area, record contents, diameters, and needed arrow directions.
- Choose materials: Match UV, moisture, and chemical exposure to the right construction.
- Install markers: Clean surfaces, align arrows with flow, and size text to viewing distance.
- Document and audit: Keep a register, photo evidence, and revisit during PMs.
Common letter-height guidelines used across industry help with legibility at distance:
| Pipe O.D. (inches) | Typical Letter Height (inches) | Suggested Marker Field Length |
|---|---|---|
| 0.75 – 1.25 | 0.5 | 8 – 12 in |
| 1.5 – 2 | 0.75 | 8 – 12 in |
| 2.5 – 6 | 1.25 | 12 – 24 in |
| 8 – 10 | 2.0 | 24 – 32 in |
| Over 10 | 3.0 | 32 – 48 in |
In our experience, aligning these sizes with actual viewing distances (e.g., mezzanines or overhead racks) prevents rework. For installation technique details and adhesive prep, see our self-adhesive pipe markers guide.
Types, Materials, and Approaches
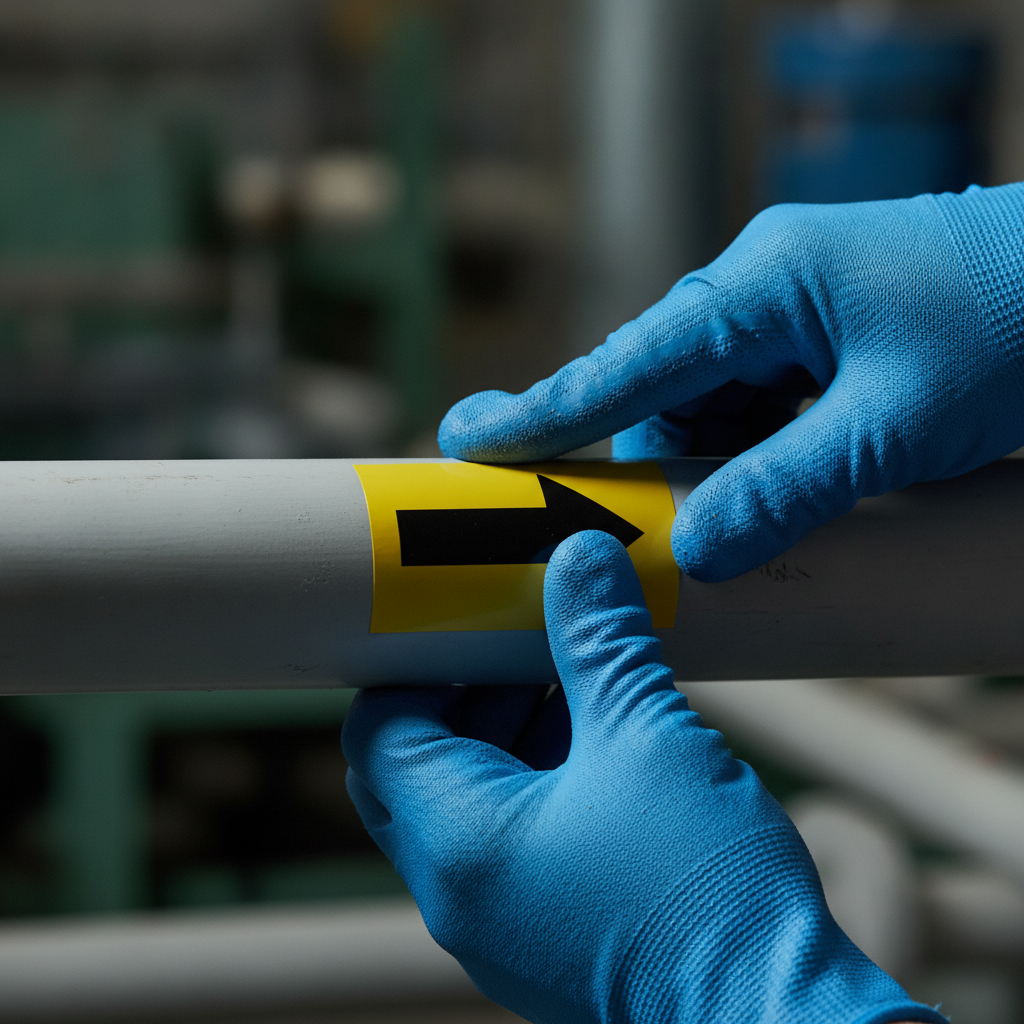
Select marker types based on pipe size, environment, and access. Self-adhesive wraps fit clean painted lines; snap-around carriers suit oily or insulated pipes; high-contrast tags and stanchions serve buried or obstructed lines. Choose materials rated for UV, moisture, and chemicals.
Marker styles you’ll actually use
- Self-adhesive wraps: Fast installs on clean, painted pipes; excellent for warehouses and utilities.
- Snap-around carriers: Good for rough, oily, or insulated surfaces where adhesion is unreliable.
- High-temp options: For hot lines near boilers or steam where adhesives can soften.
- Underground/above-grade posts: For buried or obstructed runs where on-pipe labels aren’t visible.
- Roll formats: Pipe markers on a roll for high-volume, repetitive legends along long corridors.
Material and durability considerations
- UV resistance: Outdoor exposure demands UV-stable inks and overlaminates.
- Moisture and washdowns: Use laminates and adhesives designed for wet cycles.
- Chemical exposure: Solvent-prone zones benefit from thicker films and protective coatings.
- Temperature range: Verify adhesion and film performance at winter lows and process highs.
VisionMarker engineers pipe markers to resist UV, moisture, and chemicals, supporting long service life. For specialty contents (e.g., non-potable water, hazardous gases) browse representative options like non‑potable water markers and hazardous gas markers to see typical constructions used in tough environments.
Best Practices and Placement Rules
Place markers so you can always determine contents and flow without tracing the line: at entry/exit points, valves, tees, every directional change, and at regular intervals on long straight runs. Use high-contrast legends, arrows on every marker, and letter heights matched to pipe O.D.
Placement that prevents guesswork
- At all junctions: Mark at valves, tees, and pumps so direction changes are obvious.
- At access points: Label where lines enter/exit rooms, trenches, and walls.
- At set intervals: Use consistent spacing on long runs so a marker is always in view.
- On both sides of barriers: Identify before and after walls, floors, or equipment.
Design choices that improve speed
- Short, standard legends: Keep to 1–3 words operators already use.
- Flow arrows every time: Avoid stand-alone text without arrows.
- Contrast and glare control: Matte finishes reduce reflection from high-bay lighting.
- Consistent color fields: Use your approved color categories the same way everywhere.
Use your signage system to reinforce other critical visuals. Our hazard markings guide and OSHA warning signs overview explain how floor tape, barricade markers, and wall signs complement pipe ID so routes and risks are obvious from any approach.
Tools and Resources
You need a standard legend list, a survey template, and durable markers sized to each pipe. Add cleaning wipes, a flexible tape measure, PPE, a camera or tablet for documentation, and an audit schedule tied to preventive maintenance.
Core toolkit for efficient installs
- Legend master list: Approved names, colors, and arrow conventions.
- Survey sheet or app: Pipe contents, diameter, location, and marker count.
- Surface prep: Degreasers and lint-free wipes for better adhesion.
- Sizing tools: Flexible rule/tape and O.D. gauge aids.
- Photo record: Before/after pictures attached to your register.
- Spare stock: Keep common legends and arrows in a kit for quick repairs.
Standards and training
- ANSI Z535 principles: Use clear typography and contrast that read at a glance. Our ANSI Z535 quick guide shows core patterns.
- Electrical safety crossover: Programs that teach rapid visual recognition improve response time. Guidance on NFPA 70E practices highlights why standard visuals matter during high‑stress events.
- Safety culture: Cross-referencing other spec-driven work (e.g., ASTM A706 identification) reinforces the habit of checking the label before touching the system.
For coordinated fire and emergency visuals, see our fire safety products overview. Unifying pipe ID and emergency signage helps teams move in the right direction immediately.
Case Studies and Examples
Standardizing legends and sizes cuts confusion and speeds isolation. Facilities that pair a clean survey with durable markers report faster lockouts, fewer mis-traces, and easier audits. The key is one playbook: one color system, one size chart, and consistent placement everywhere.
Utility corridor refresh (warehouse)
- Challenge: Long runs with sporadic, fading markers; new staff unsure of flow direction.
- Approach: Surveyed by zone, set 25–30 ft interval markers, added arrows at every change.
- Outcome: Teams verified lines without backtracking; PM crews closed work orders faster.
Ammonia refrigeration (industrial)
- Challenge: Harsh environment, condensation, and frequent washdowns degrading markers.
- Approach: Selected UV/moisture-resistant wraps and snap-around carriers on insulated sections.
- Outcome: Labels stayed legible; operators confirmed suction/liquid returns at a glance.
Boiler room consolidation (commercial)
- Challenge: Varied legacy legends; same fluid named three different ways.
- Approach: Adopted a standard legend set tied to color categories, purged duplicates.
- Outcome: Training time dropped; contractors followed one consistent playbook.

Need help crafting that playbook? Our marking systems safety guide breaks down how to unify color codes, floor markings, and wall signage so movement and hazards read the same way across your site.
Free program review (soft CTA): Want a second set of eyes on your legend list and size chart? VisionMarker can review your survey template and recommend ANSI-certified markers engineered for UV, moisture, and chemicals. Start the conversation on our website.
ANSI/ASME Color Categories at a Glance
Use recognized color fields so categories read instantly. Common conventions include red for fire quenching, yellow for flammable/oxidizing, orange for toxic/corrosive, green for water, blue for compressed air, and brown for combustible fluids, with arrows and short legends on each marker.
While you should always align your facility standard with the latest ASME A13.1 publication, many USA sites use the following category logic:
- Fire quenching fluids: Red field; aim for high contrast legends.
- Flammable/oxidizing fluids: Yellow field; concise legends preferred.
- Toxic or corrosive: Orange field; maximize legibility and symbol clarity.
- Water systems: Green field; potable and non‑potable need distinct legends.
- Compressed air: Blue field; add pressure where relevant.
- Combustible fluids: Brown field; apply arrows consistently.
- User‑defined/other: Neutral schemes reserved for site‑specific media.
Cross-train crews so they can decode these categories instinctively—just like standardized electrical labels improve recognition under stress. For context on the value of visual standards in high‑risk work, see this overview of NFPA 70E practices.
Program Implementation: Step-by-Step
Document your standard, survey every line, select materials for the environment, install with surface prep, and audit on a schedule. Use one legend list across the site, and log marker counts, sizes, and photos in a central register for easy updates.
- Define the standard: Color categories, legends, letter sizes, and approved materials.
- Survey and register: Capture O.D., content, flow, install location, and count per line.
- Procure markers: Choose ANSI-certified constructions aligned with UV/moisture/chemical exposure.
- Prepare surfaces: Remove oils/dust; dry before adhesion.
- Install consistently: Entry/exit, valves, direction changes, and set intervals.
- Quality check: Verify arrow orientation and readability from normal approach angles.
- Audit and maintain: Tie inspections to PMs; replace damaged or missing labels promptly.
Many teams align this with broader safety programs. For instance, a routine that reviews arc flash labels also triggers a quick pass on nearby pipe markers—because shared habits around standardized visuals raise overall safety performance.
Integrating Pipe Markers with Facility Signage
Treat pipe ID as part of a unified visual language. Align pipe colors and legends with wall signs, floor markings, and emergency signage so information agrees from any approach. This integration reduces hesitation and speeds the right actions.
- Wayfinding alignment: Floor markings lead to valves; wall signs confirm equipment functions.
- Emergency readiness: Fire protection signs and pipe markers share conventions for fast reading.
- Training materials: Use one legend card in SOPs, onboarding, and toolbox talks.
Explore how we connect these elements in our fire safety products overview and the ANSI Z535 quick guide. Harmonized visuals reduce cognitive load, especially during emergencies.
Inspection and Maintenance
Inspect pipe markers on a fixed cadence—quarterly in harsh zones, semiannual in moderate areas. Check adhesion, fading, abrasion, and arrow orientation. Keep spare legends and arrows to fix issues on the spot and update your register after each round.
- Inspection triggers: PM cycles, MOC events, seasonal temperature swings, and area turnarounds.
- What to check: Legibility, contrast, surface integrity, arrow direction, and placement coverage.
- Quick fixes: Replace damaged wraps; re‑clean and re‑apply where adhesion suffered.
- Documentation: Photo before/after; update counts and locations in your register.
Programs that treat visuals like any other asset (inspected, documented, and maintained) see fewer surprises during audits and emergencies. Consistency builds muscle memory across crews.
Frequently Asked Questions
Most teams ask about color categories, marker sizes, and placement intervals. In short: adopt ASME A13.1 categories, size letters to pipe O.D., add arrows on every marker, and place labels at entries, valves, changes in direction, and regular intervals along long straight runs.
What is the difference between ASME A13.1 and ANSI Z535?
ASME A13.1 defines content categories and common color fields for pipe identification. ANSI Z535 focuses on visual design principles like typography, contrast, and symbols. Together they guide what your marker should say and how it should look so people can read it quickly.
Where should pipe markers be placed?
Place markers at entry and exit points, at valves and tees, before and after walls or floor penetrations, at changes in direction, and at consistent intervals on long straight runs. This ensures you can identify contents and flow without tracing a line end‑to‑end.
How do I size the text on a pipe marker?
Match letter height to pipe outside diameter. Common industry guidelines: 0.5 in letters for 0.75–1.25 in O.D., 0.75 in for 1.5–2 in, 1.25 in for 2.5–6 in, 2 in for 8–10 in, and 3 in for over 10 in. Larger text supports longer viewing distances.
Do I need arrows on every marker?
Yes. Arrows remove ambiguity. They allow responders and technicians to follow flow toward the correct isolation point without tracing a line end‑to‑end. Include arrows even when flow seems obvious from equipment layout.
Conclusion
ANSI pipe labeling turns complex systems into readable maps. When you standardize colors, legends, sizes, and placements—and maintain them on a schedule—crews move faster, avoid errors, and face audits with confidence.
- Adopt ASME A13.1 categories and ANSI Z535 readability.
- Survey lines, size letters to O.D., and place markers at key points.
- Choose durable materials for UV, moisture, and chemicals.
- Integrate with signage and train to one legend list.
- Audit and refresh routinely; keep spare stock on hand.
Next step: Share your legend list and a sample survey with VisionMarker. We’ll recommend ANSI‑certified, durable markers matched to your environment and rollout timeline.
Related Articles
To deepen your program, pair this guide with our ANSI Z535 quick guide for sign design clarity, the self‑adhesive pipe markers how‑to for installation technique, and our marking systems safety guide for aligning pipe ID with floors and wall signage.
