Canada


Choosing how to display pipe marker flow direction is a small decision with big operational consequences. Correctly placed arrows reduce worker confusion during shutdowns, speed maintenance tasks, and shorten emergency response time when teams must locate isolation valves quickly. This article compares common arrow styles, placement rules, marker sizing, and material choices so you can select a configuration that matches three typical priorities: emergency isolation, routine maintenance, and process control.
Why marking flow direction matters
Flow-direction arrows are the visual cue technicians use to trace a pipeline back to its source or to the nearest isolation point. During emergency shutdowns or lockout/tagout procedures, personnel commonly trace flow backward to isolate equipment, so an explicit arrow saves time and reduces the risk of isolating the wrong section. For operational teams, arrows also eliminate guesswork during reroutes and temporary connections, reducing downtime and error potential. See industry guidance on directional pipe markers for tracing and isolation logic for more detail.
Standards and color-code context for directional markers
ASME A13.1 is the primary reference for pipe identification in North America, and it pairs color coding with text and arrows to convey both contents and direction. In practice, combine a clear arrow with the ASME A13.1 color band and an abbreviated substance name to provide two layers of identification: the color band as the secondary method and the arrow as the explicit directional cue. Vendor claims of ANSI certification and durability should be confirmed with product datasheets before ordering. For background reading, see the directional pipe marker overview and facility compliance guidance.
References:
- Directional Pipe Markers | DuraLabel
- Creating & Maintaining an ANSI/ASME Compliant Facility | Marking Services Incorporated
Arrow style compared: single arrow, double arrow, chevrons, and continuous
Arrow style affects clarity at a glance and the cognitive load on crews tracing piping. Below are common options and how they perform against the three use cases.
- Single arrow: one central arrow printed on a marker. Low visual density, quick to read at choke points, best where runs are short and piping geometry is unambiguous.
- Double arrows: opposing or repeated arrows on a single marker. Reduce ambiguity on runs that may appear to go in two directions at fittings or where sightlines are limited.
- Chevron pattern: angled repeated arrows across a long band. High visibility along long runs and across obstructions, good for corridors and overhead trays where fast direction recognition is required.
- Continuous directional strip: a series of adjacent arrow graphics applied at intervals. Best for long, uninterrupted mains to support tracing without stopping to read each marker.
When to use a single arrow versus double arrows
Use a single arrow when pipe routing is short or when markers will be installed near valves, pumps, or equipment that provide unambiguous context. Single arrows are economical and reduce clutter. Choose double or opposing arrows when a run includes frequent changes in visible direction, pipes run behind panels, or a run branches and sightlines are limited. Double arrows help in HVAC, mixed-service headers, and long insulated runs where a single arrow can be hidden from one approach.
Chevron marks and continuous directional strips
Chevron patterns and continuous strips trade text density for directional signal strength. Chevrons are most useful where personnel view the pipe from varying angles or when speed matters, such as in emergency corridors or plant-wide mains. Continuous strips are appropriate for large-diameter mains or where valves are spaced far apart and crews need repeated confirmation of flow direction without stopping. Both styles are commonly used in facilities that prioritize fast wayfinding over minimal visual impact.
Arrow placement and orientation rules on pipe runs
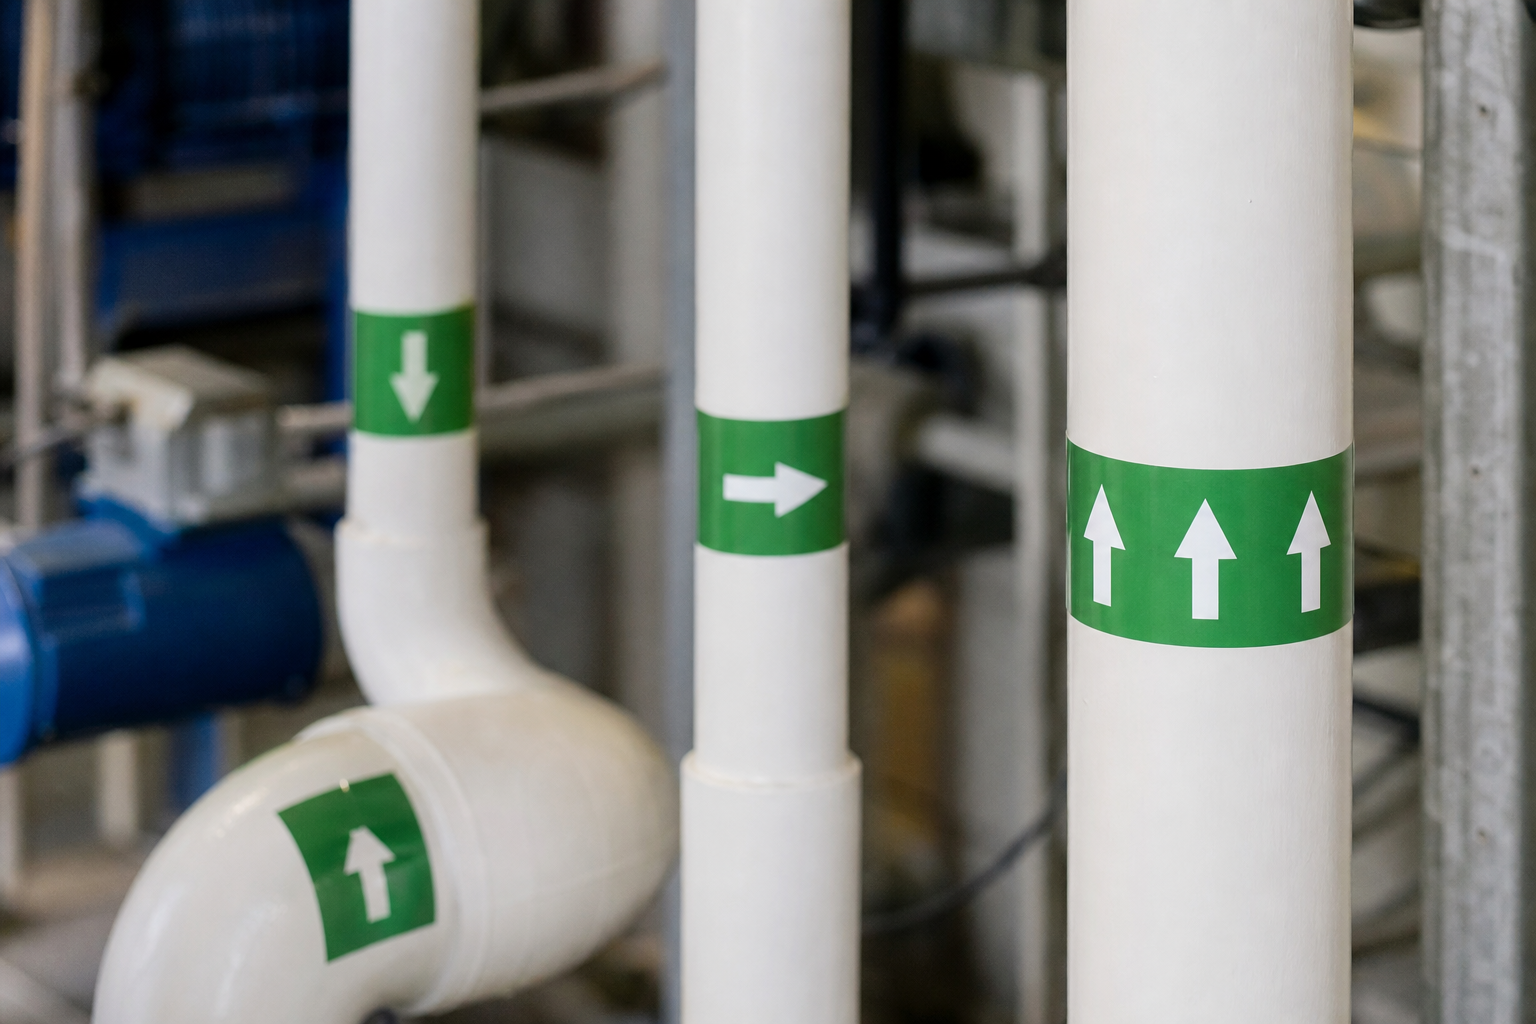
Good placement minimizes ambiguity and ensures markers remain visible after routine maintenance or insulation work. The following rules reflect common industry practice and help maintain consistent identification.
- Place arrows at consistent intervals so crews can follow a line without pausing to examine each marker.
- Locate the primary marker near valves, pumps, and equipment connections where directional decisions are made.
- Mount markers on the pipe body or on the nearest accessible surface so they remain visible from normal approach paths and from inspection platforms.
Horizontal, vertical, and insulated pipe guidance
For horizontal runs, mount markers so arrows point in the actual flow direction relative to the pipe axis. For vertical pipes, arrows should indicate upward or downward flow and be placed where they are readable from the most common work platform. When pipes are insulated, mount markers on the insulation jacket if the jacket is stable and exposed. If insulation is frequently removed for maintenance, install a secondary marker on the supporting hanger or nearby structural element so the direction remains visible when the insulation is absent.
Marker size, material, and durability compared
Choose marker dimensions and materials to match pipe diameter, mounting surface, and environmental exposure. Marker size affects legibility at distance and aligns with many facility naming conventions.
- Size relative to pipe diameter: Small-diameter pipes (under 2 inches) can use compact markers; medium pipes typically use 2- to 4-inch-high bands; larger pipes and mains require wider markers or continuous strips so text and arrows remain legible at expected viewing distances.
- Adhesive roll markers: flexible and wrap around curved surfaces, easy to apply and cost-effective for many runs, but require clean surfaces and may fail on rough or contaminated surfaces over time.
- Rigid labels and plaques: more durable for outdoor or corrosive environments, commonly used near equipment and valves.
- Weatherproof materials: UV-stable vinyl or laminated polyester resist fading, moisture, and common chemicals. Verify vendor claims and material data for the expected exposure profile before purchase.
VisionMarker lists ANSI-certified products engineered for UV, moisture, and chemical resistance. Confirm material choices with manufacturer datasheets to match your site conditions and service life expectations.
Decision checklist: emergency isolation, routine maintenance, and process control
The checklist below maps each common use case to recommended arrow style, number and spacing of arrows, marker size, and material. Use it to evaluate options before you order samples or quotes.
- Emergency isolation
- Arrow style: chevrons or double arrows for fast recognition
- Number/spacing: markers at each valve and every 10 to 20 feet on long runs
- Marker size: larger band or continuous strip on mains for visibility
- Material: laminated, UV-stable rigid or weatherproof vinyl
- Routine maintenance
- Arrow style: single arrow where piping geometry is clear, double arrows at branches
- Number/spacing: markers near pumps, tees, and valve clusters; intermediate markers every 15 to 30 feet
- Marker size: medium band sized to pipe diameter
- Material: adhesive roll or laminated label depending on surface cleanliness
- Process control and operator awareness
- Arrow style: continuous strips or chevrons on visible runs inside control areas
- Number/spacing: continuous or very frequent markers where flows are monitored
- Marker size: large on process mains to support distant viewing
- Material: high-durability vinyl with clear text contrast
For a product example with directional arrows and a text label, consider requesting a sample such as the pipe marker process water return with arrow to evaluate size, material, and legibility before a larger purchase.
How to confirm compliance and request a quote

Before you place an order, follow these verification steps: request the product datasheet and ANSI or ASME conformity statement, ask for a printed sample or mockup in the correct color and size, and confirm installation guidance for insulated or curved runs. If your facility operates in Canada, check whether CAN/CGSB-24.3-12 or other regional standards apply in addition to ASME A13.1. Use vendor technical pages and product datasheets to prepare a formal quote request and specify custom text, color band, and arrow style.
Start your vendor review at the manufacturer site and request a sample or quote with representative pipe diameters, media names, and your preferred arrow style. VisionMarker provides product details and quoting through its website.
Common objections and real-world troubleshooting
- Layout changes: For frequently changing piping, use adhesive wrap markers or removable rigid plaques so you can update labels without repainting.
- Crowded pipe bundles: Install markers on the topmost accessible pipe or on hangers and supports to avoid blocked sightlines.
- Multilingual sites: Pair the standard color, arrow, and abbreviated English content with secondary-language text on larger markers to maintain clarity for diverse crews.
- Retrofitting insulated runs: Apply markers to insulation jackets that remain in service or add secondary markers to nearby structural supports so direction remains evident when insulation is removed.
How to get a quote and sample for your site
To order a sample or request a custom quote, prepare a short list of representative pipe diameters, media names, and preferred arrow style. Submit those details through VisionMarker’s site or request a product sample such as the pipe marker process water return with arrow to evaluate size, material, and readability before a larger purchase.
Frequently asked questions
Do ASME A13.1 pipe marker rules require arrows to show flow direction
ASME A13.1 and common industry practice pair color bands and text with arrows to indicate flow. While the standard prescribes content and color conventions, arrows are the accepted method to convey direction and are widely recommended for operations and safety.
How many directional arrows should I place on a long pipe run
Place markers at valves, pumps, and fittings and add intermediate markers at regular intervals. For emergency-critical mains, consider markers every 10 to 20 feet or continuous chevrons for unambiguous direction over long spans.
Can I mount directional markers on insulated pipes and still be compliant
Yes, if the insulation jacket is stable and exposed. If insulation is removed for maintenance, add secondary markers to hangers or nearby structures so direction remains visible when jackets are off.
What marker size is recommended for large diameter pipes
Use wider bands or continuous strips on large-diameter pipes so arrowheads and text remain readable from expected viewing distances. Many facilities select markers with taller text and larger arrows on mains to maintain legibility.
How do I confirm a directional marker meets ANSI or ASME compliance before ordering
Request the manufacturer’s conformity statement, ask for a sample or mockup in your facility colors and sizes, and compare the product’s legends and color bands to ASME A13.1 requirements. Vendor technical pages and product datasheets should state ANSI or ASME alignment.
Ready to evaluate samples and get a custom quote? Prepare pipe diameters, media names, and preferred arrow style, then request a sample or quote through VisionMarker’s site.