
 Canada

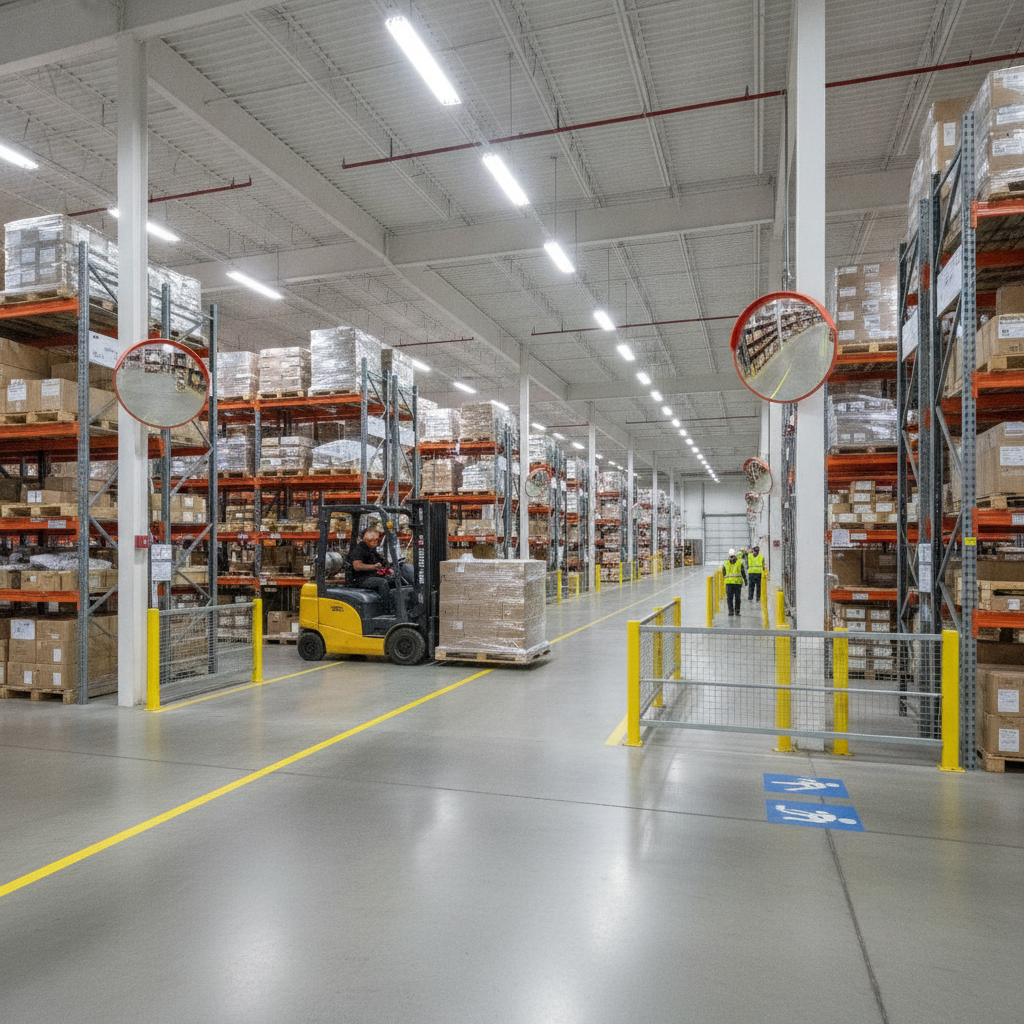
Forklift signs are standardized visual cues that direct drivers and protect pedestrians in industrial spaces. They use ANSI/OSHA color conventions, symbols, and placement rules to communicate hazards and right-of-way in seconds. In the USA, consistent forklift signage reduces collision risk, speeds decisions, and supports routine safety audits for warehouses and plants.
By VisionMarker Editorial Team · Last updated: 2026-06-28
Overview
This guide explains what forklift signs are, why they matter, how to deploy them, and which standards influence design and placement. You’ll see practical layouts, proven legibility rules, and real examples from VisionMarker’s ANSI-certified catalog to help you implement a safer, audit-ready facility.
- Define forklift traffic signs and where they fit in your safety system
- Map signs to high-risk areas: docks, aisles, blind corners, and walkways
- Apply clear placement, mounting height, and legibility rules
- Connect signs with floor markings, PPE notices, and fire protection cues
- Use VisionMarker’s ANSI-certified, durable materials for long service life
What Are Forklift Signs?
Forklift signs are safety signs that control forklift and pedestrian interactions in warehouses, plants, and distribution centers. They rely on standardized colors, symbols, and wording to signal right-of-way, speed, hazards, and safe behavior so drivers can act in seconds and pedestrians know where to walk.
At their core, forklift signs translate risk into fast, visual direction. Color carries urgency, symbols compress complex ideas, and concise wording eliminates guesswork. When installed consistently, they create a shared language that operators and visitors can understand at a glance.
VisionMarker’s safety catalog emphasizes ANSI-certified quality and adherence to widely used standards and symbol conventions. For common messages such as “Caution – Forklift Traffic” or “Forklifts Operating,” see our product examples inside the forklift category, including Caution: Forklift Operating in This Area and Caution: Forklift Traffic.
- Core elements: standardized colors (e.g., yellow for caution), clear symbols, concise wording
- Physical construction: rigid aluminum or durable plastics; rounded corners and mounting holes
- Finishes: UV-stable inks and protective laminates for outdoor and indoor longevity
- Visibility aids: reflective films for low-light docks; high-contrast graphics for long aisles
- Placement: eye-level mounting or overhead repeats at long sightlines and intersections
Because forklift routes often evolve, we recommend pairing wall/column signs with floor-based guidance. VisionMarker’s broader hazard markings framework is detailed in our Hazard Markings Guide, which complements forklift messages with floor tape, caution stripes, and stencils.
Why Forklift Signs Matter
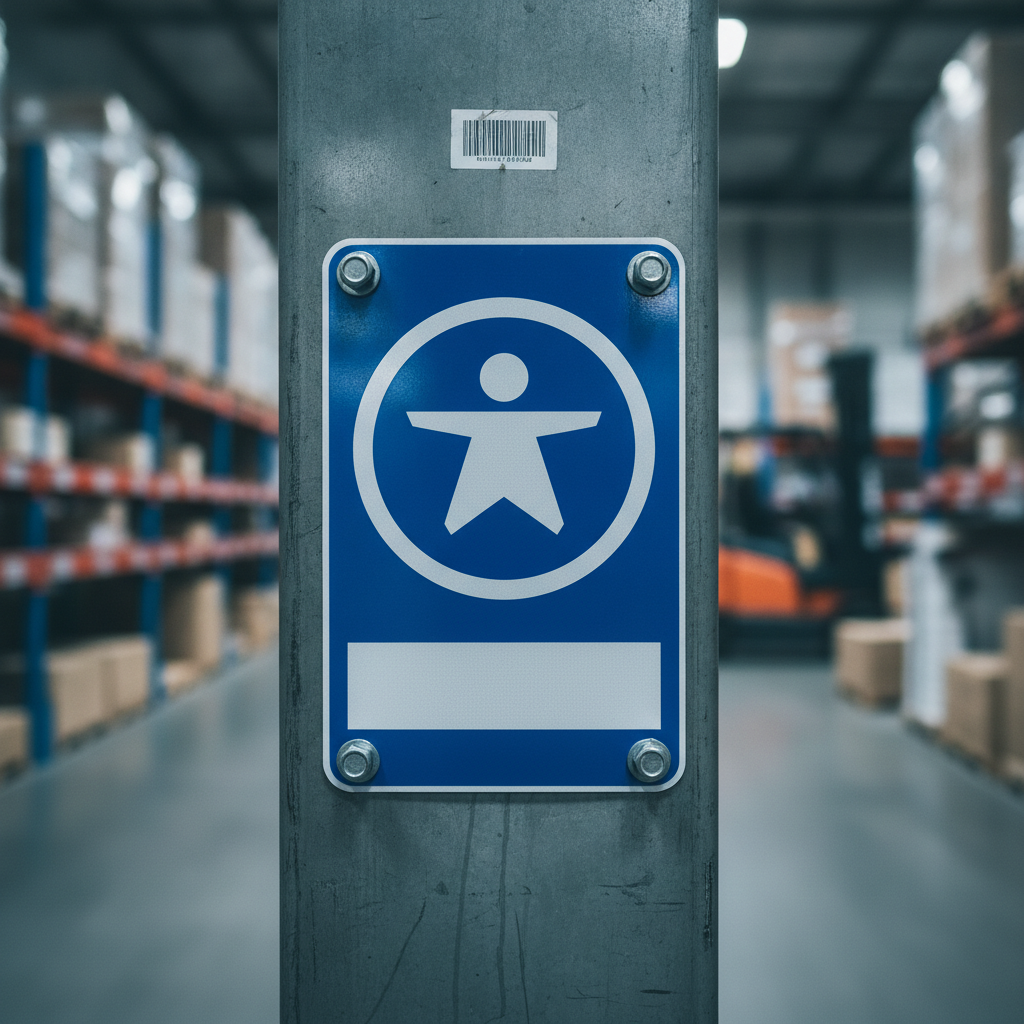
Forklift signs reduce collision risk, standardize right‑of‑way, and speed operator decisions. Clear, consistent visuals help facilities document compliance expectations, reduce near misses, and reinforce training—especially in high‑traffic docks, cold storage, and fast‑moving pick aisles.
Even well-trained operators face blind corners, mixed pedestrian traffic, and shifting stacks that tighten sightlines. Standardized visuals reduce decision time, which is crucial when a forklift can cover 20–30 feet in seconds. Clear “stop,” “yield,” and “sound horn” prompts tighten behavior at the exact points where risk spikes.
Signage also leaves an auditable trail. During inspections and refresher training, supervisors can point to consistent messages at every intersection and dock face. In our experience, this consistency raises situational awareness across shifts and reduces repeat errors by making the safe action the obvious action.
- Risk control: highlights crossings, merges, and pedestrian zones where near misses cluster
- Training reinforcement: mirrors your SOPs so habits stick on the floor
- Operational flow: fewer hesitations at intersections and dock entries keeps moves smooth
- Accountability: visible expectations make coaching and incident reviews concrete
Broader safety programs often connect mobile equipment rules with electrical, fire, or fall protection controls. For context on how other teams communicate compliance topics beyond lift trucks, see this discussion of electrical safety program alignment in NFPA 70E-focused guidance and an example of documented fire-protection compliance practices via NFPA 96 certification processes. For working-at-heights programs, explore a representative fall arrest equipment lineup.
How Forklift Signs Work in a Facility
Effective forklift signage follows the material flow. Map routes, flag conflict points, select durable materials, and mount signs at eye level with redundant views. Reinforce with floor tape and mirrors so drivers and pedestrians receive the same clear message from multiple angles.
Start by walking the floor with a route map. Mark every spot where a driver’s decision needs help: aisle merges, doorways, ends of rack, battery rooms, and pedestrian cut-throughs. Then assign the smallest set of signs that will reliably prompt the right behavior at each point.
- Route mapping: sketch primary and secondary forklift lanes and pedestrian corridors.
- Conflict tagging: log blind corners, dock plates, congested pick zones, and doorways.
- Sign selection: use caution/yield/stop, “sound horn,” speed guidance, and pedestrian right‑of‑way messages.
- Placement: mount at 5–7 ft from finished floor; repeat overhead where sightlines are long.
- Reinforcement: pair with floor tape, stencils, convex mirrors, and guardrails for layered cues.
- Review: validate sign visibility from seated operator eye height and from a walker’s eye line.
| Area | Primary Message | Mounting Height | Spacing/Redundancy | Notes |
|---|---|---|---|---|
| Blind intersections | Stop / Sound Horn | 5–7 ft | Repeat 25–40 ft ahead | Consider convex mirror and floor stop bar |
| Pedestrian crossings | Yield to Pedestrians | 5–6 ft | Every approach lane | Add zebra floor stripes and guardrail if space allows |
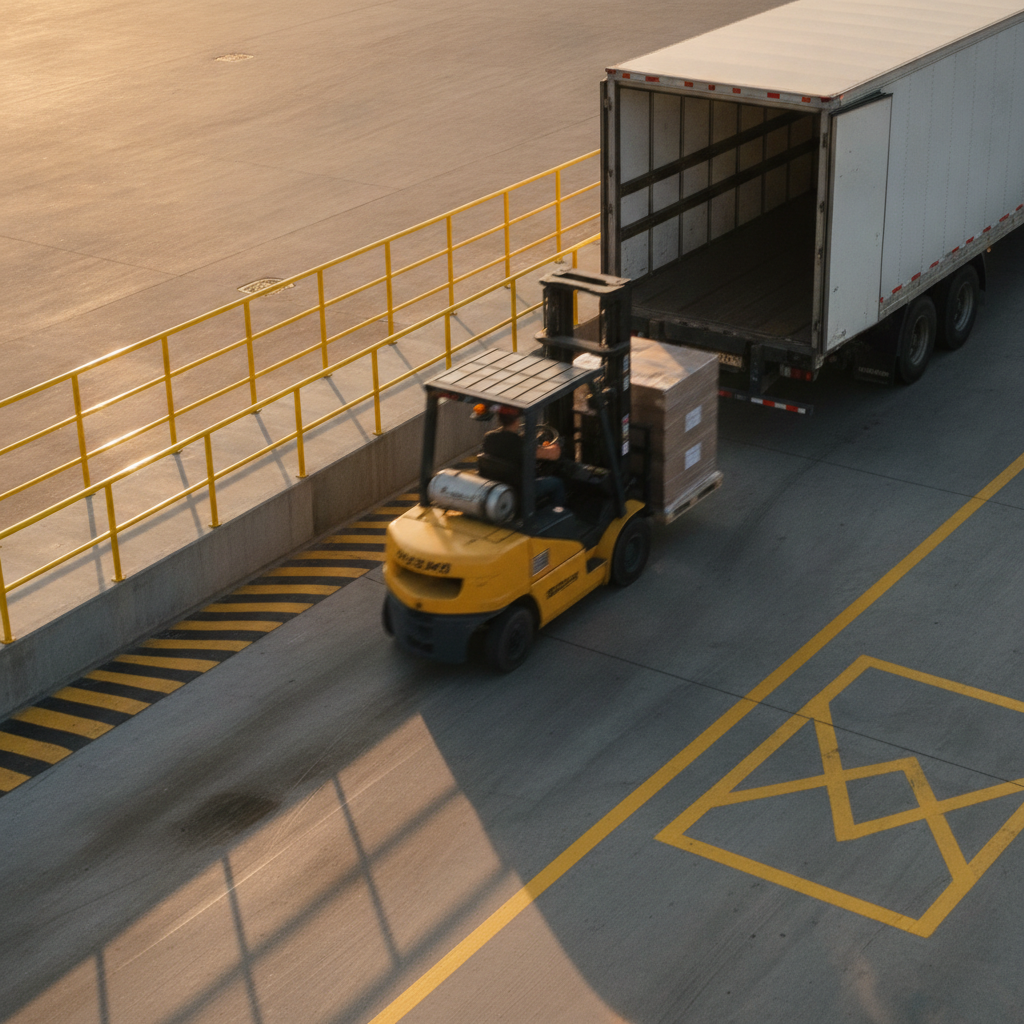
| Dock approach | Slow / Sound Horn | 6–7 ft | At 50 ft and 15 ft | Reflective finish for low light |
| Battery/charging | No Smoking / PPE | 5–7 ft | Entry + inside | Pair with eye wash and spill kit signs |
As you install, standardize fasteners and mounting hardware to improve maintenance. VisionMarker signs ship with durable constructions and rounded corners that handle frequent cleaning and contact without edge fray.
Types of Forklift and Pedestrian Signs
Forklift sign programs blend regulatory, warning, instructional, and floor-based cues. Use stop/yield for control, caution for hazards, behavior prompts like “sound horn,” and floor markings to define lanes and crossings. Keep wording short, symbols clear, and placements redundant.
Different messages work together to control speed, establish right‑of‑way, and protect people at predictable pinch points. Here’s a practical lineup we deploy most often with Safety, Operations, and Maintenance teams.
Regulatory control signs
- Stop: Full stop at blind corners and at pedestrian corridors that cut through aisles.
- Yield: At merges and where pedestrians cross mid‑aisle.
- Speed reminders: Use sparingly; place where long straight runs invite speeding.
Warning and caution signs
- Forklifts Operating: Flags active areas for visitors and office staff walking to the floor. See this example sign.
- Forklift Traffic: Alerts at intersecting walkways, rack ends, and staging zones. Browse our caution forklift traffic option.
- Slippery When Wet: For coolers, exterior ramps, and winter dock aprons where traction changes fast.
Instructional behavior signs
- Sound Horn: At blind entries, overhead doors, and pallet wall corners.
- Pedestrian Right‑of‑Way: Where walkways cross lanes; pair with zebra floor stripes.
- Keep Aisles Clear: At staging boundaries to prevent encroachment into travel lanes.
PPE and adjacent hazard communication
- PPE Required: Eye or foot protection reminders at dock plates and maintenance bays.
- Prohibited/Restricted: Entry controls for traffic‑free zones and equipment rooms. See our prohibited area sign guidance.
- Fire protection adjacency: Keep forklift staging off extinguishers, cabinets, and exits; align with our fire signage guide.
Finally, connect fixed signs with hazard markings and lane identifiers so the entire message is obvious underfoot and ahead. For a deeper dive into lane tape, stencils, and color coding, review VisionMarker’s Hazard Markings Guide.
Standards, Symbols, and Colors Explained
Use ANSI/OSHA color conventions and widely recognized safety symbols to speed comprehension. Yellow/black signals caution, red indicates prohibitions or fire equipment, and green marks safe conditions. Pair simple symbols with brief text so operators and visitors act without decoding long sentences.
Most facilities align forklift signs to the same color and hierarchy system used for other safety messages. Yellow-and-black signals cautionary conditions (e.g., forklift traffic areas), red covers prohibitions and fire‑related items, and green marks general safety information or routes.
- Color hierarchy: Yellow/black for caution; red/white for prohibition or fire; green/white for safe condition.
- Symbol clarity: A single, high‑contrast icon beats multiple busy graphics.
- Word economy: Lead with the verb (“Stop,” “Yield,” “Sound Horn”).
- Durability: UV‑stable inks and weatherable substrates for docks and outdoor aprons.
VisionMarker’s catalog emphasizes ANSI-certified quality and compatibility with commonly used symbol sets, which helps you maintain a coherent visual system across forklift, PPE, fire protection, and general warning sign categories.
Best Practices for Placement and Legibility
Mount forklift signs at 5–7 feet, keep messages short, and repeat at long approaches. Use reflective finishes at dim docks and pair wall signs with floor tape and mirrors. Validate sightlines from a seated operator’s eye height and from pedestrian level before you finalize.
In high-activity spaces, clarity beats quantity. A small set of perfectly placed messages will outperform a cluttered wall every time. Here are field‑tested rules that Safety and Operations teams rely on.
- Mounting zone: 5–7 feet from finished floor for most walls and columns; lower in low‑headroom coolers.
- Viewing distance: Prioritize large, high‑contrast graphics on long aisles and exterior aprons.
- Redundancy: Repeat critical controls (Stop, Yield, Pedestrian) on each approach lane.
- Floor integration: Add lane tape, zebra crossings, and STOP bars where drivers actually look.
- Lighting: Choose reflective finishes for docks and early‑morning/late‑day exterior use.
- Hardware: Use bolt‑mounted or adhesive‑backed options to match the surface and environment.
Before sign‑off, ride with an operator and walk with a pedestrian to confirm the same message is visible from both perspectives. In our experience, this five‑minute test prevents most relocation work later.
Tools and Resources to Implement Quickly
Build your program from durable, ANSI‑certified components. Start with core forklift messages, then add PPE, prohibited‑area controls, and fire protection adjacency cues. Use lane tape and stencils to connect the story underfoot, and document placements for training and audits.
VisionMarker serves facilities across the USA with standards‑driven products engineered for UV, moisture, and chemical resistance. That durability matters when signs live on busy docks and in low‑temperature storage. To jump‑start your rollout, tap these resources:
- Forklift messages: Browse Forklifts Operating and Forklift Traffic.
- Foundational warning system: Align forklift cues with our warning sign overview.
- Hazard markings: Plan lanes, crossings, and STOP bars using the Hazard Markings Guide.
- Fire protection context: Keep staging clear of extinguishers and exits; review the Fire Signage Guide.
- Access control: Set clear boundaries with the Prohibited Area Sign Guide.
Share a floor plan and a few site photos. Our team will recommend a right‑sized forklift signage kit—with lane tape, mirrors, and hardware options—so you can implement in days, not weeks.
Case Studies and Real‑World Examples
The strongest forklift programs keep messages simple and visible. In practice, sites see fewer near misses at blind corners, better pedestrian discipline at crossings, and smoother dock approaches after standardizing stop/yield, horn prompts, and floor markings.
High‑volume e‑commerce DC
Problem: multiple near misses at end‑of‑rack blind corners during peak. Action: installed “Stop” and “Sound Horn” pairs at 12 intersections, added convex mirrors, and painted STOP bars. Result: clearer right‑of‑way and fewer hard brakes at rack ends during rush periods.
Food and beverage cooler
Problem: low‑light, low‑headroom cooler with wet floors and shared pedestrian cut‑through. Action: switched to reflective “Yield to Pedestrians,” lowered mounting height slightly, added zebra crossings and anti‑slip. Result: improved visibility in dim, cold conditions and steadier pedestrian behavior.
Outdoor shipping yard
Problem: dusk/dawn dock approach collisions with yard trucks and forklifts. Action: added reflective “Slow / Sound Horn” repeats at 50 ft and 15 ft, with guardrails and wheel‑stop buffers. Result: steadier approaches and fewer sudden stops on uneven pavement.
Frequently Asked Questions
Forklift signage questions usually center on placement, symbol choice, and integration with floor markings. Keep messages short, mount signs in the 5–7 ft band, and repeat critical controls on every approach. Validate sightlines from both a seated operator and a walking pedestrian.
Where should forklift signs be placed?
Mount at 5–7 feet from finished floor on walls or columns and repeat at long approaches. Focus on blind corners, pedestrian crossings, dock approaches, and doorways. Pair wall signs with floor markings and mirrors so both drivers and pedestrians see the same prompt.
What types of forklift signs are most effective?
Use a small set that covers control, caution, and behavior: Stop/Yield for right‑of‑way, “Forklifts Operating” or “Forklift Traffic” for awareness, and “Sound Horn” where sightlines are tight. Add zebra crossings and STOP bars so the same message appears underfoot.
How do I keep signs visible in low‑light docks?
Choose reflective finishes and large, high‑contrast graphics. Add redundant signs at 50 and 15 feet on dock approaches and verify visibility from a seated operator’s eye height at dusk and dawn. Supplement with mirrors and guardrails to reinforce the visual path.
How do forklift signs relate to other safety systems?
Treat signage as one layer of control. Align forklift prompts with warning signs, fire protection cues, and PPE notices. Use consistent colors and symbols so your SOPs, training, and the floor all speak the same visual language.
Related Topics: Warning Signs & Hazard Markings
Strong forklift programs sit inside a larger visual safety system. Extend your gains by aligning forklift messages with general warning signs, lane tape, and fire protection markers so every route, crossing, and staging zone tells a clear, consistent story.
If you’re formalizing your broader safety communication system, connect this guide with our warning sign overview, hazard marking strategies, and fire signage guidance referenced throughout this article. Treat the forklift lanes as your “spine” and build out consistent messages from there.
Conclusion and Next Steps
Forklift signs work when they’re simple, visible, and repeated where risk spikes. Map routes, place concise messages at conflict points, and connect wall signs with floor markings. Standardize hardware and finishes so your system stays readable through seasons and shifts.
- Key takeaways
- Keep the message set small and precise; repeat at long approaches.
- Mount in the 5–7 ft zone; validate from seated and standing eye lines.
- Use reflective finishes at docks and on exterior runs.
- Connect with floor tape, zebra crossings, and mirrors for redundancy.
- Document placements for training and audits.
Ready to standardize your floor? Share your routes and photos. We’ll recommend a right‑sized kit—forklift signs, lane tape, mirrors, and mounting hardware—built from ANSI‑certified, durable materials that stand up to UV, moisture, and chemicals.
